|
Projects in Progress
Wat is er
gaande...
Weblog Jan
Westerink  
Donderdag, 4 mei 2010
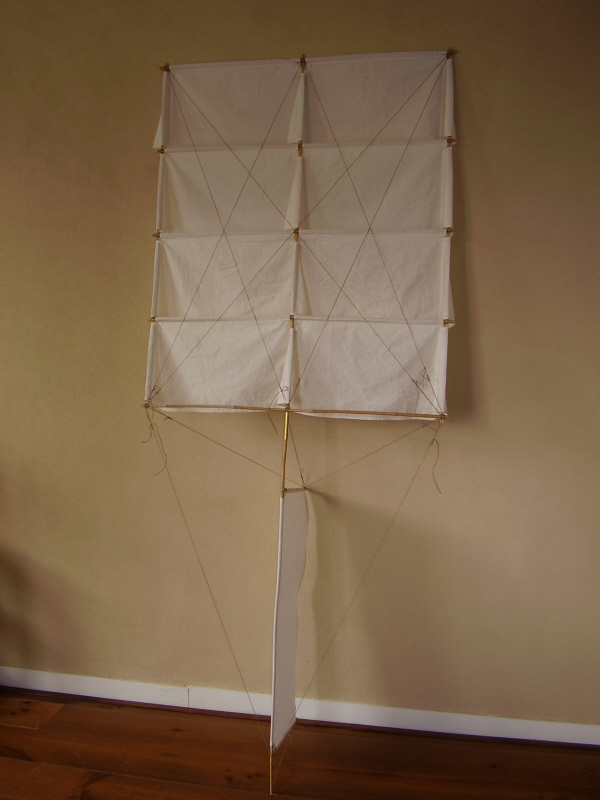
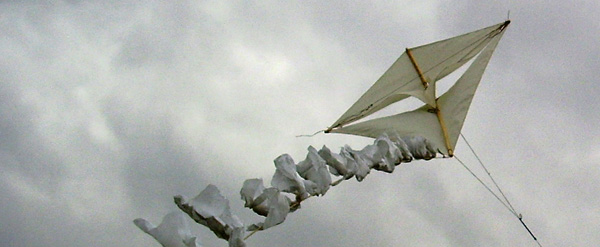
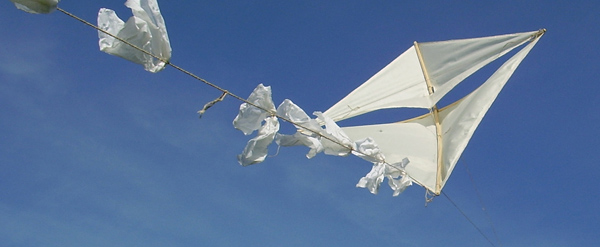
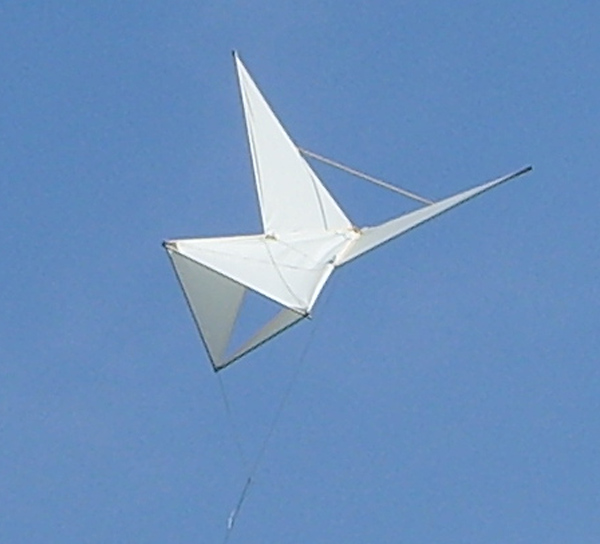
Goed, het kost een hoop tijd, maar het is echt waar:
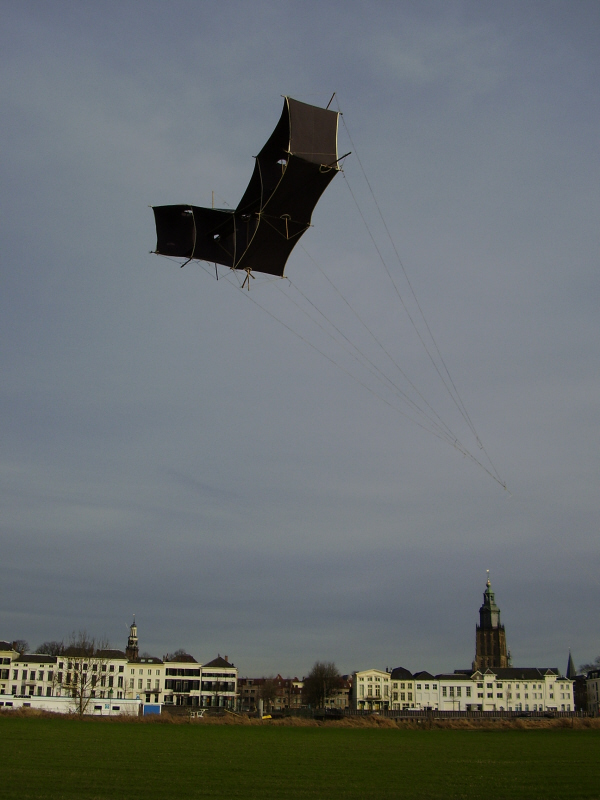
de Kusnetsov kan echt volledig gericht en vlak getrokken worden door
het spannen van de spandraden. En als het dan uiteindelijk gedaan
is, iets om echt trots op te zijn, een strakke en vlakke
Kusnetsov.
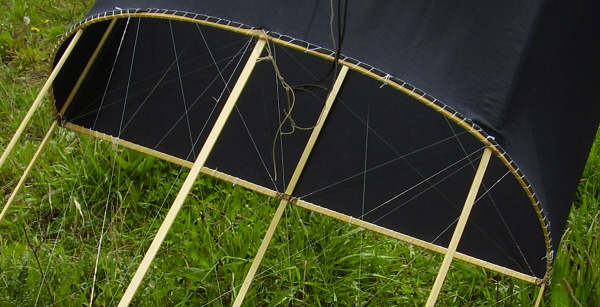
(Fig.
125)
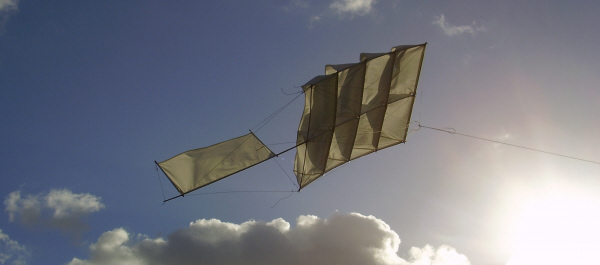
Leuk detail is het
elastiek in de toom. Bij een windstoot rekt het elastiek en komt de
vlieger vlak te liggen. Bij een wat vlagerige wind is het goed te
voelen aan de vliegerlijn dat het elastiek aan het werk is.
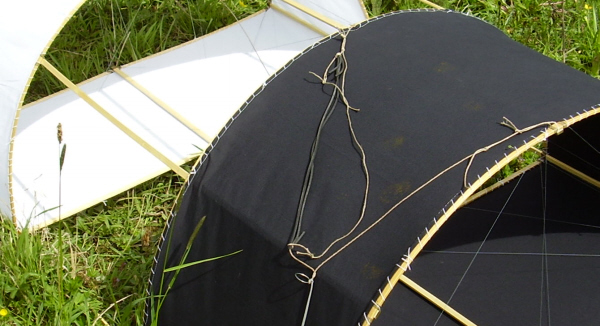
(Fig. 124)
Wellicht moet ik de
toom met het elastiek iets beter afstellen, want af en toe heeft de
vlieger de neiging een duik in te zetten. Gelukkig ben je dan, als
je een goede 260 meter lijn hebt afgerold zodat het geheel de tijd
en vooral de ruimte kan krijgen zich weer te herstellen. Maar goed
voor je hart is het niet...
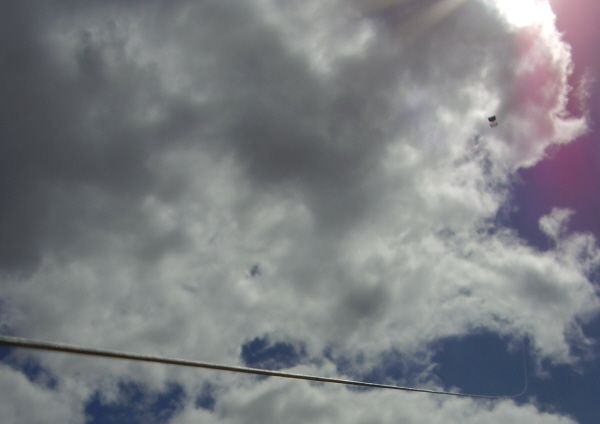
(Fig. 123)
Zaterdag, 24 mei 2010
Mooi weer, goede
vrienden, prima plek voor de 10e Historical Kite Workshop
in Stade, Duitsland. Mooie dingen om te bespreken en te ontdekken,
bijvoorbeeld de radio antenne vlieger van Wheelwright (US2386762 and CA422725), meegebracht door Ulli Draheim.
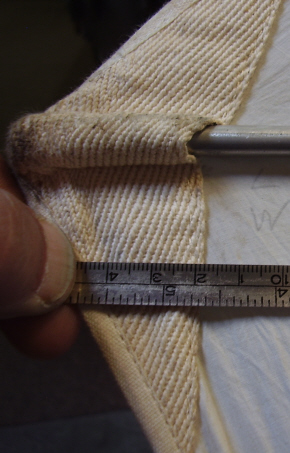 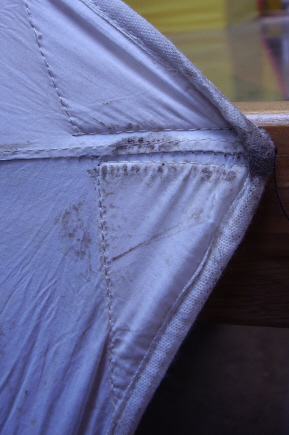
(Fig. 121 and 122)
Zondag, 25 mei 2010
Ik mocht iets vertellen aan de zaal vol enthousiaste
deelnemers van de HKWS in Stade. Natuurlijk heb ik Barbara Sellers
net uitgekomen boek "A Moment in Time" laten zien vol met
interessante details uit Mathew Sellers technische dagboek. Zeer de
moeite waard. (Zie Bird Kite.)
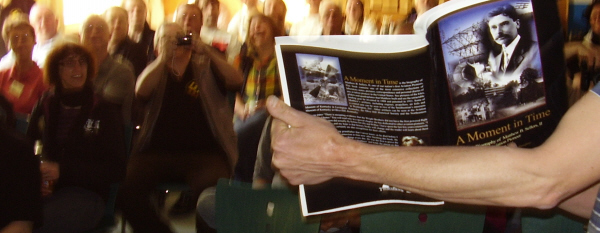
(Fig. 120)
Kite
Research tot op het bot... Nooit meer irritatie als je eigen werk
niet zo goed wordt als je zou willen. Zie het werk van
professionals: de Wheelwright productie vlieger.

(Fig. 119)
Woensdag, 14 april
2010
Soms
ben je jaren bezig met een vlieger, zonder succes. Het model van
papier, van 24 maart 2009, geïnspireerd
op de gepatenteerde vlieger van Holland uit 1938, is er zo een.
De maanden geleden
gemaakte grotere versie vloog van geen meter. Het frame van te dunne
ronde stokken verboog zo door de wind dat de hele vlieger vervormde
en er niets mee te beginnen was.
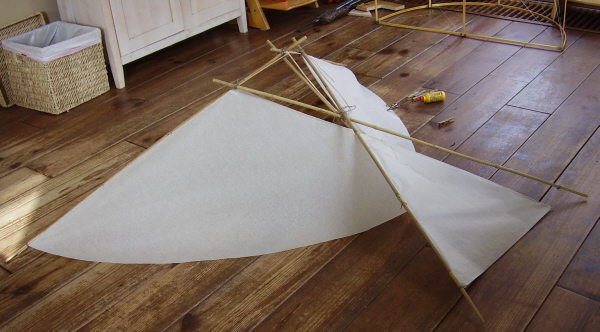
(Fig. 118)
Het frame werd daarna gedubbeld met
dikker bamboe, maar weer zonder succes. Nu hangt de vlieger mooi te
zijn aan het plafond en moet ik hem voorlopig eerst daar maar even
laten.
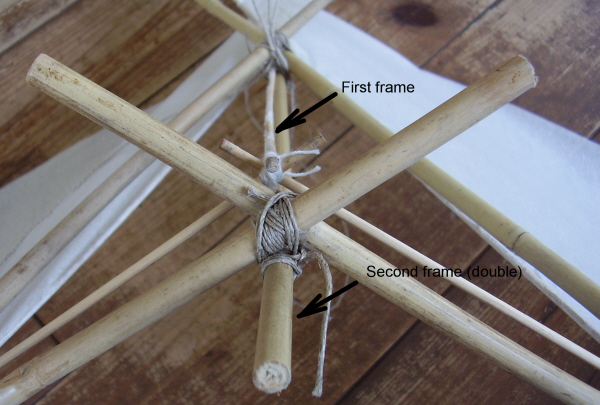
(Fig. 117)
Intussen was er ook nog een andere
versie van het frame gemaakt en die slingerde ergens rond, totdat
het werd voorzien van papier, maar totaal anders dan oorspronkelijk
de bedoeling was. Deze vlieger lijkt in geen enkel opzicht meer op
het oorspronkelijke idee. Vandaag namen we hem mee naar ons
vliegerveldje.
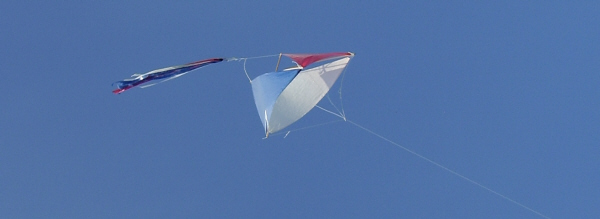
(Fig. 116)
Maar, ook deze uitvoering vloog
(mischien moet ik zeggen: uiteraard) van geen meter.
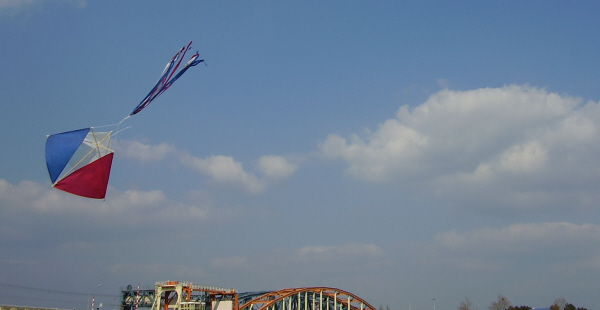
(Fig. 115)
Dus, toch maar het frame op de bedoelde
en geplande manier van papier voorzien en dan nog maar eens gaan
proberen.
3 maart
2010
Het is dan wel even geleden dat het ding
af kwam, maar nu is het dan zover: we gaan hem
proberen.
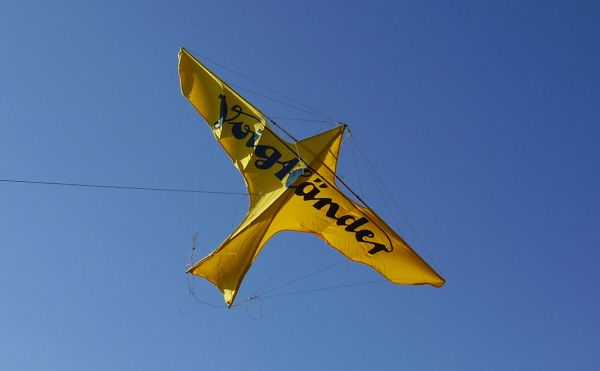
(Fig. 114)
Maar dan gaat het ook gelijk helemaal
goed. Zeker vergeleken met de inmiddels lang geleden laatste keer
vliegeren op 23 september. Hij schiet makkelijk omhoog en hij blijft
daar ook zonder problemen.
De Voigtländer is een bijzondere
vlieger. Ook al ziet hij er rommelig uit hij vliegt
fantastich.
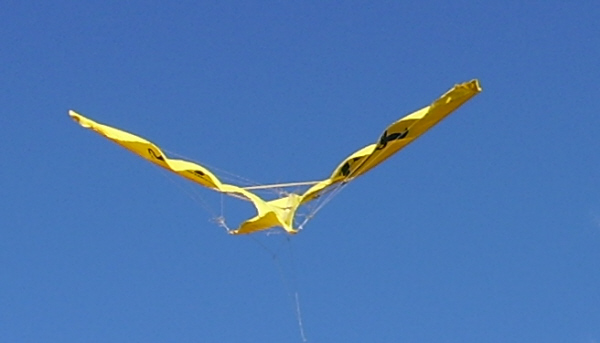
(Fig. 113)
4 februari
2010
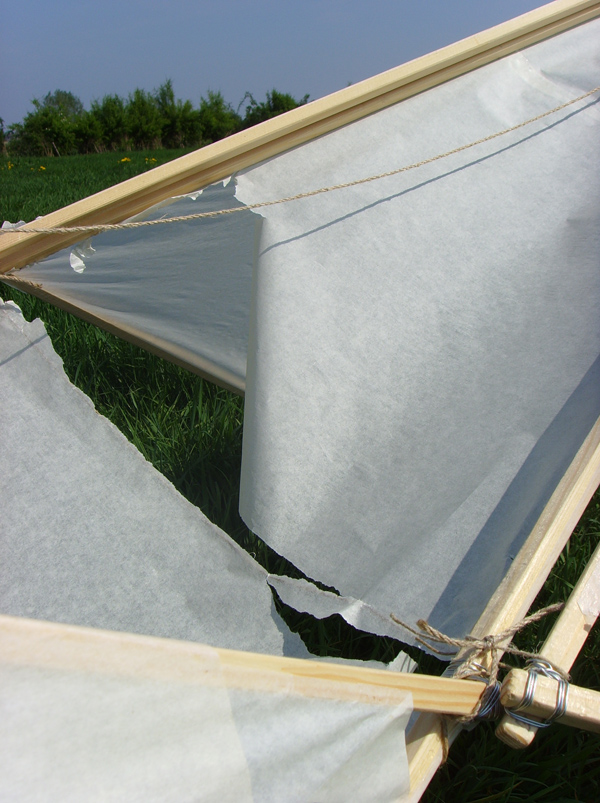
Het
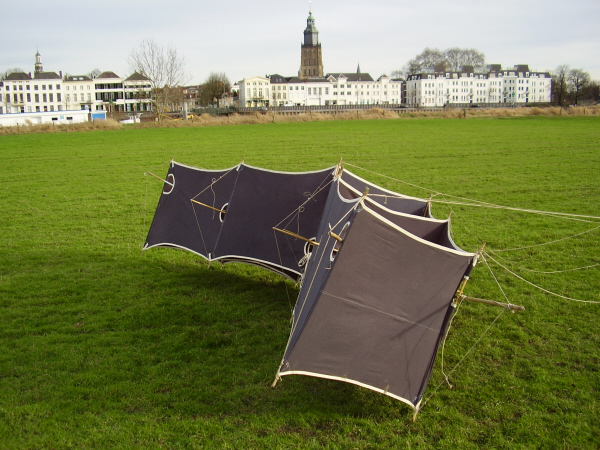
valt niet mee om de stof aan het frame van de Kusnetzow te
bevestigen. En al is het frame verstevigd met gespannen ijzerdraad,
het trekt toch behoorlijk krom als de stof aan het frame genaaid
wordt.
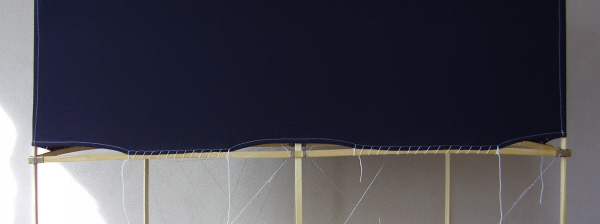
(Fig. 112)
30 januari
2010
Een
paar jaar geleden na het maken van mijn honderste vlieger stopte ik
met tellen. Ik hou van vliegeren, maar vliegers bouwen is pas echt
leuk! Dus voordat de Voigländer af was was ik ook alweer aan een
Russische, de Kusnetzow begonnen. Hiervoor gebruikte ik de mooi
gemaakte onderdelen van een bouwpakket van de HKWS 2008 (Historical
Kite Workshop) in Friedrichshaven.
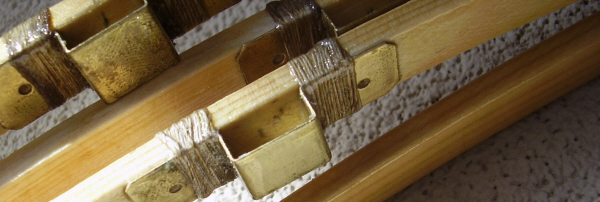
(Fig. 111)
Het is prettig werken met de altijd goed
verzorgde HKWS bouwpakketen.
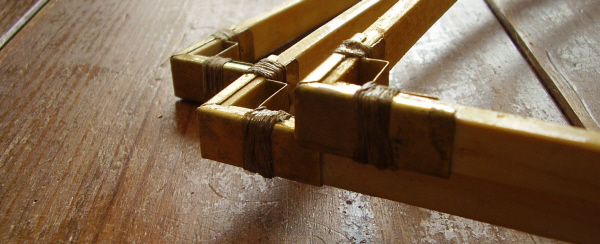
(Fig. 110)
25 januar 2010
En dan is er weer een vlieger klaar. Nu
nog wachten op goed weer en tijd voor de eerste proefvlucht. Een
paar onderdelen zijn mooier uitgevallen dan bij het origineel. Dat
is eigenlijk niet de bedoeling…
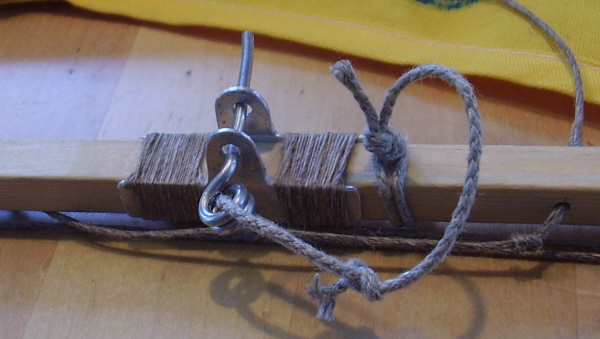
(Fig. 109)
Zaterdag, 3 januari
2010
Aan de hand van een bouwtekening op internet, een paar
boeken met achtergrond informatie en wat foto’s van vrienden is het
afgelopen maand gelukt om de Voigtländer vlieger op papier te
krijgen.
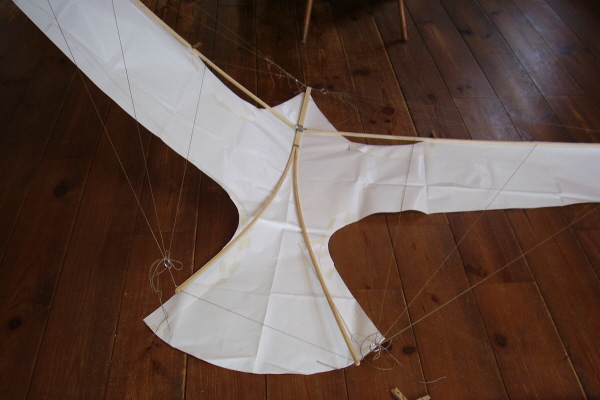
(Fig. 108)
Vooral het Duitse boek: “Lustige Windvögel” en
enkele bouwtekeningen van Horstenke geven veel extra informatie die
je niet zo een-twee-drie uit de foto’s kan halen, zoals over de
buiging van de dubbele staander.
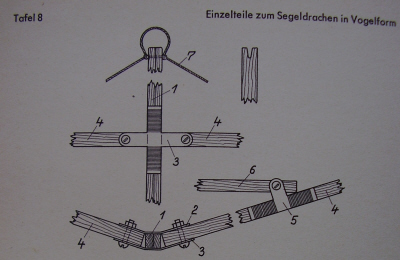 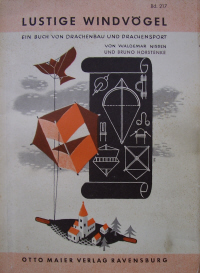
(Fig. 106 en Fig. 107)
Eerst maakte ik het frame en aan de hand daarvan pas de
mal voor de stof. Katoen, uiteraard.
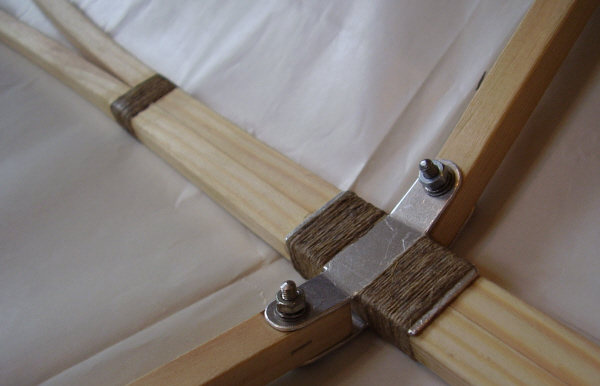
(Fig. 105)
Toen het doek klaar was is er eerst, op afvalstukjes
natuurlijk, geëxperimenteerd met de blauwe verf voor de belettering.
Het beletteren van je vlieger die net klaar is, is absoluut geen
ontspannend werkje: Niets mag er mis gaan, geen vlekje of
uitschieter kun je je veroorloven.

(Fig. 104)
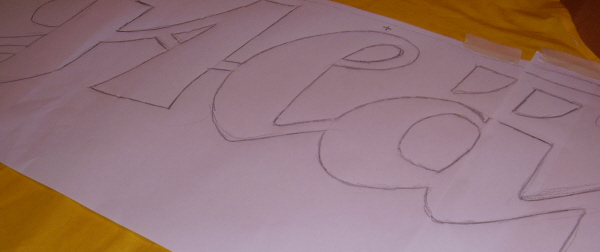
(Fig. 103)
Zondag, 27 december
2009
De
katapult (Hochstart Vorrichtung / hoogstart), ontworpen door
Oesterle voor het lanceren van zweefvliegtuigen is klaar voor
een eerste test. Nu nog een paar zweefvliegtuigen bouwen die achter
de horizon mogen verdwijnen. Ik denk trouwens niet dat ik dit
apparaat onder Oesterle's driedekker ga
proberen...
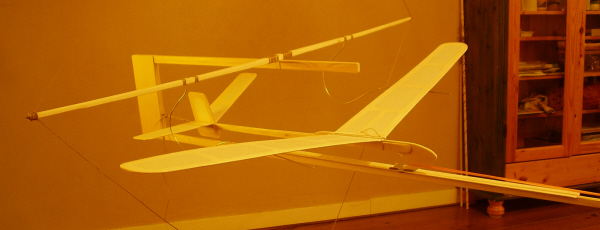
(Fig. 102)
Woensdag, 23 september
2009
Een bijzonder moment, de Oesterle
vlieger eindelijk in de lucht, met brandende lont, klaar om een foto
te maken met het Voigtländer fototoestel uit de jaren
dertig!
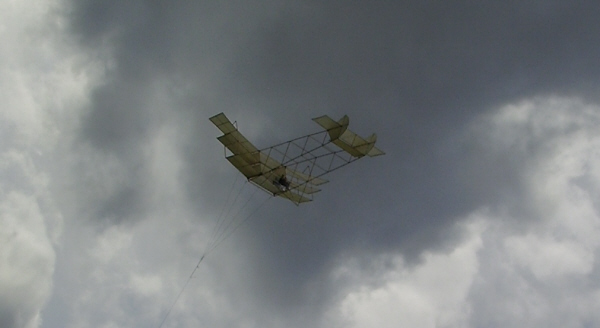
(Fig. 101)
En dan gebeurd het, zo kort na de geweldige start: de
Oesterle driedekker stort in een vervelende windvlaag
neer.
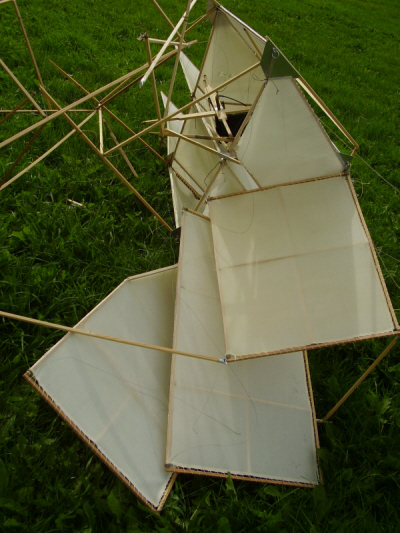 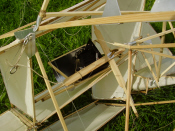
(Fig. 99 en 100)
Zaterdag, 19 september
2009
De Oesterle (zonder vleugels) boven
op de Volvo op weg naar een atelier van vrienden vlak bij een
geschikt vliegerveld. Daar kan hij wachten op de perfecte
omstandigheden voor een eerste proefvlucht. Nu het weerbericht in de
gaten blijven houden. (Fig. 97)
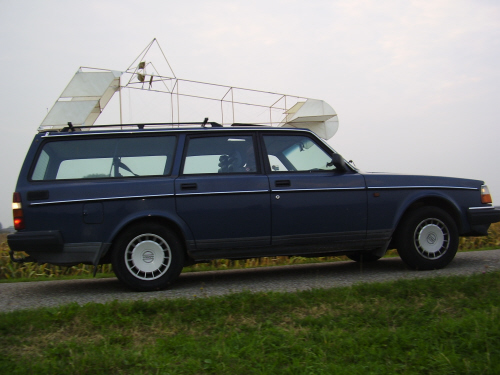
(Fig. 98 and 97)
Zondag, 6 september
2009
Vandaag,
zondag 6 september, is het zover. Een speciaal moment, na elf
maanden werk, is de driedekker van Oesterle klaar.
Wat nu... een klein project tussendoor, of toch maar weer
iets groters?
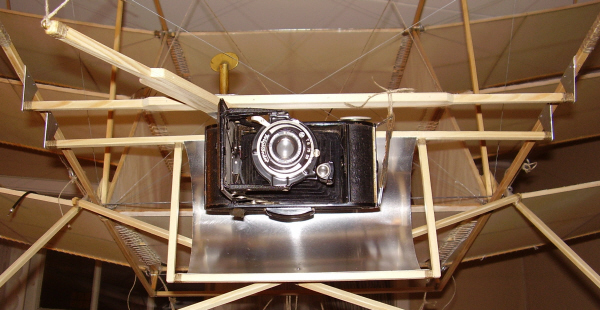
(Fig. 96)
Zaterdag, 29 augustus
2009
Het schiet op, de vlieger van Oesterle is nu bijna klaar.
Het is prettig om na maanden werk aan andere projecten, deze
driedekker weer ter hand te nemen. De finishing touch, de laatste
dingetjes. Het is relaxed werk. Iets wat de eerste proefvlucht wel
niet zal zijn, vrees ik.

(Fig. 95)
Zondag, 17 augustus
2009
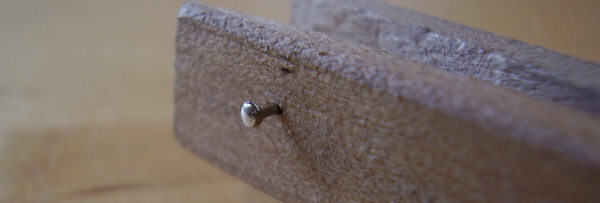
Ook het kleinste spijkertje is belangrijk om het project
te laten slagen.
(Fig. 943)
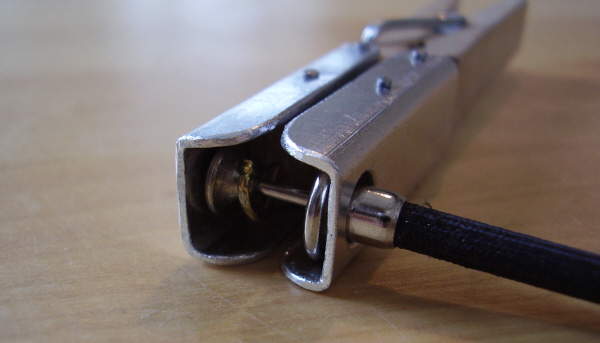
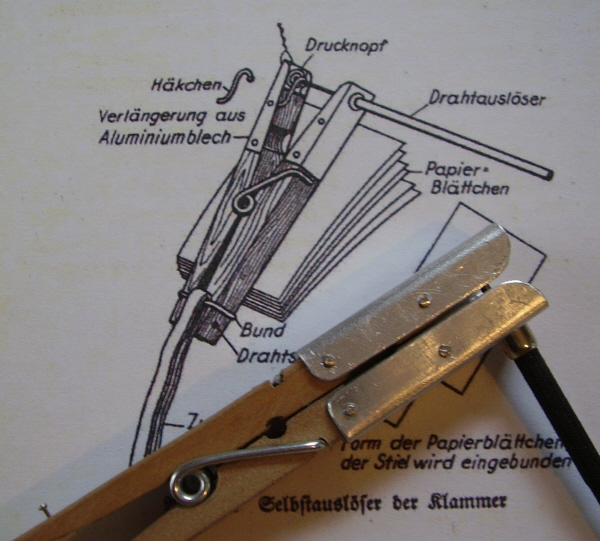
De wasknijper die de sluiter zal bedienen, als een lont
een draadje heeft doorgebrand. (Als alles goed
gaat.)
(Fig. 93)
(Fig. 92)
Donderdag, 9 juli
2009
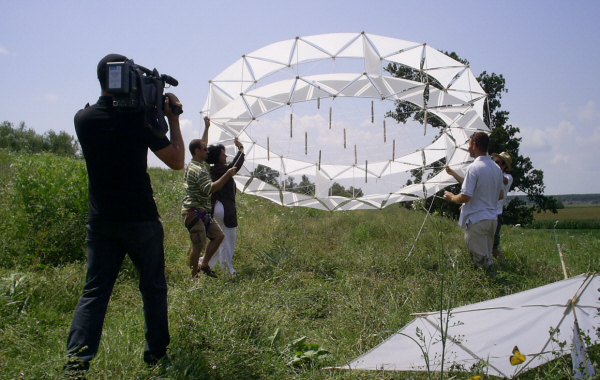
Op de filmset. Heet en heel erg lang wachten. Maar
uiteindelijk komt alles op zijn pootjes terecht en lukt wat we
willen doen!
(Fig. 91)
Woensdag, 8 july
2009
Op
het strand bij Ferara in Italië is het eindelijk zover. Alles en
iedereen is bij elkaar: de ronde vlieger van Alessandro Andreini en Andrea Casalboni en de
boodschapper die de zaden zal verspreiden. Het is een spannend
moment voor iedereen, vier architecten en drie
vliegeraars.
Andreini en zijn schitterende vlieger met houten frame en
ook houten verbinders tussen de ronde stokken. (Fig.
90)
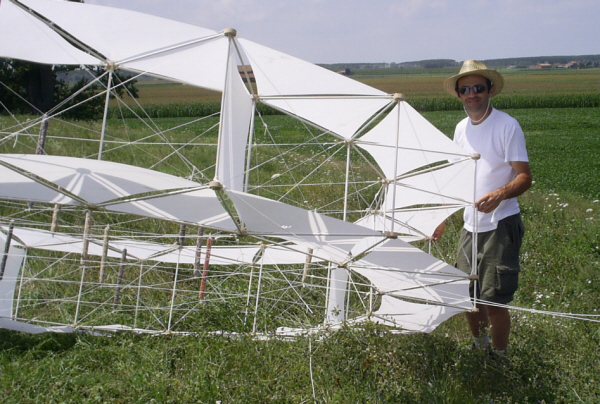
(Fig.
90)

Video
van de test met de boodschapper die zaad verspreid ophet strand van
Ferrara:
Video 12,2 MB, Zal even duren dus...
Of op
YouTube 
Donderdag, 14 mei
2009
Links en rechts van de pendel twee zijpanelen gemaakt.
Hoewel dit het vlieger-effect van de boodschapper zal verminderen
(fig. 89), denk ik wel dat de vergroting van het oppervlak het
makkelijker zal maken om een gewicht aan zaden naar boven te
krijgen. De zijpanelen zijn demontabel.
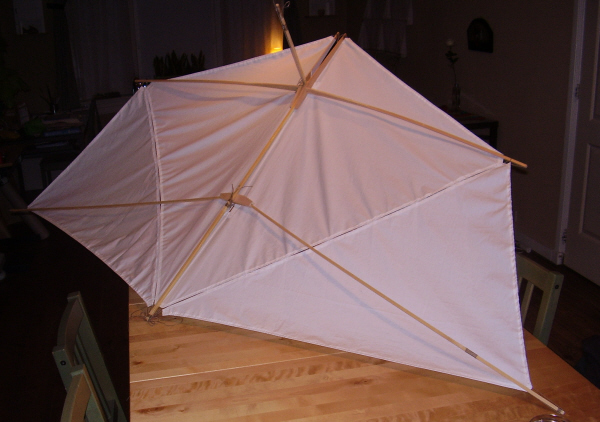
(Fig. 89)
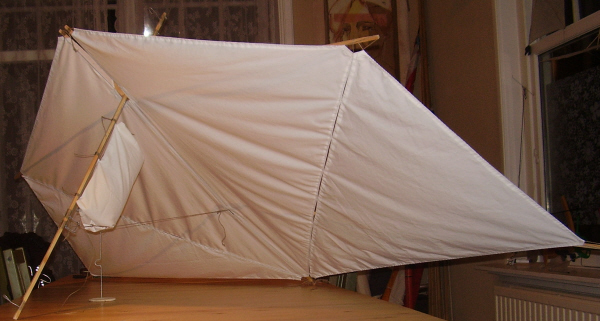 De boodschapper klaar voor gebruik. Een zak met zaden als
bagage. De boodschapper klaar voor gebruik. Een zak met zaden als
bagage.
(Fig. 88)
Maandag, 25 mei
2009
De zaden voor de documentaire over de renaturalisatie van
de Italiaanse Po worden door een boodschapper / pendel omhoog
gebracht naar een ronde vlieger. Deze ronde vlieger zal worden
gebouwd door de internationaal bekende Italiaans vliegerbouwers
Alessandro Andreini en Andrea Casalboni.
(Fig. 87)
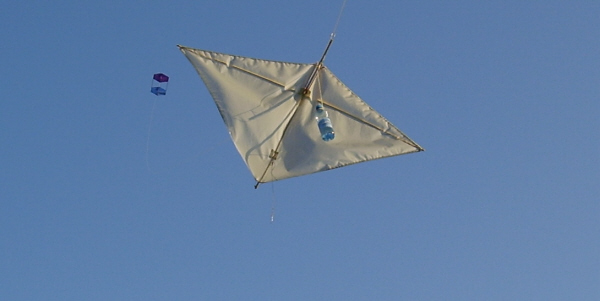
Het probleem van een boodschapper die langs de
vliegerlijn omhoog geblazen wordt is dat hij behalve zijn bagage ook
zijn eigen gewicht naar boven moet tillen. Daar komt bij dat de
ronde Cassagne vlieger niet de meest geschikte vlieger is om een
vracht de lucht in te tillen. Het is daarom goed om een boodschapper
te kiezen die ook nog lift-capaciteit heeft, zoals een Eddy of
Woglom vliegervormige boodschapper (Fig. 86). Op de foto een fles
met water aan de boodschapper (Fig. 86) om zijn ‘til-vermogen’, de
lift te testen.
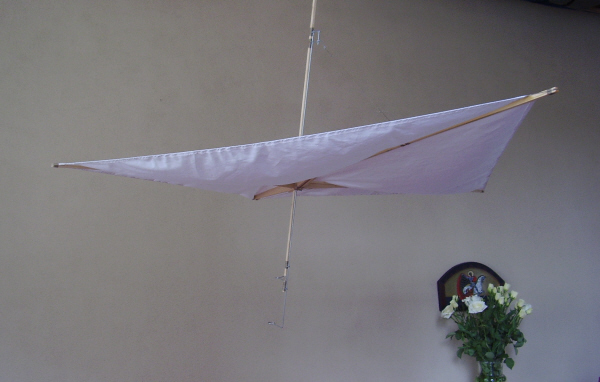
(Fig. 86)
Einde Nederlandse vertaling.
More in
English...
Construction of the
Eddy/Woglom shaped messenger. The upper part of the stick
is made in two parts to let the kite line through.
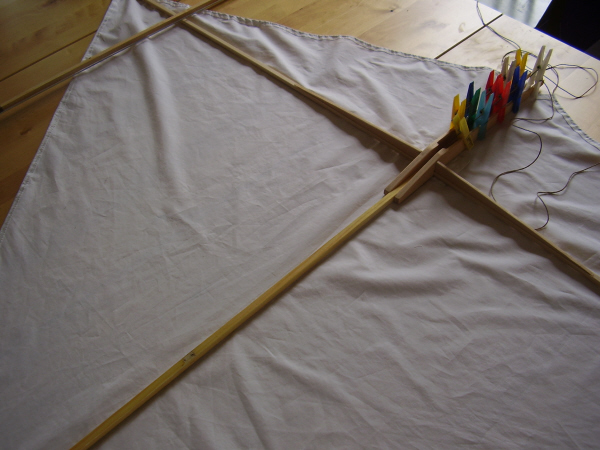
(Fig. 85)
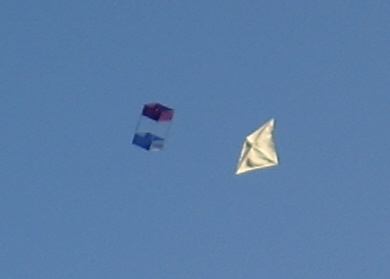
A video of one of the kite messenger tests:
Video 1,93 MB Take your time to
download...
Or on YouTube 
Saturday, 28 March
2009
The full scale one didn't fly, because of the weakness of
the very thin frame. I tried to make a very light kite, but evething
turned out to light and fragile. But the little model was
beatifull.
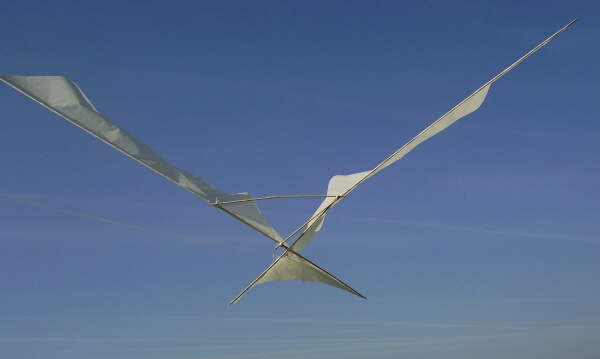
(Fig. 84)
Tuesday, 24 March
2009
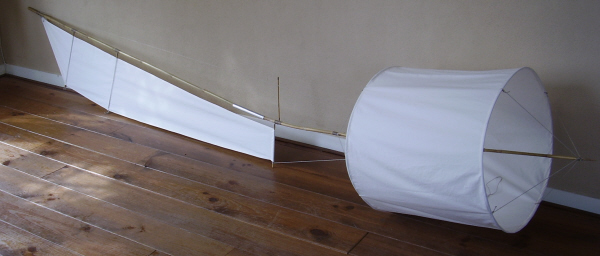
Made a model of a new paper kite inspired on the Holland
1938 kite.
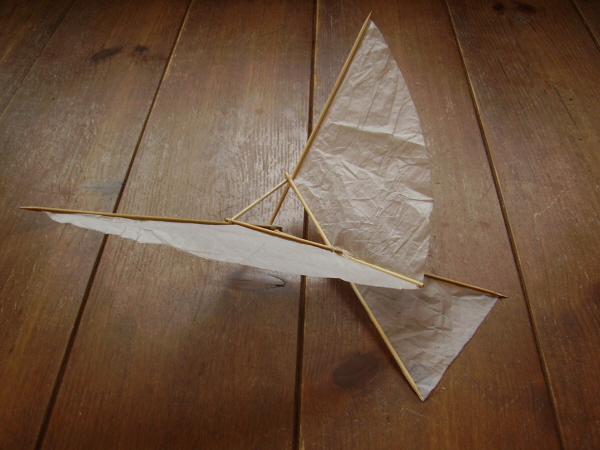
(Fig. 83)
Sunday, 22 March
2009
Some months ago a mail from Venice - Italy
arrived:
"We are thinking about a no profit Po
river re-naturalization project and we have to prepare a
little movie to express the suggestion of the idea.
We would like to use a big kite to spread some endangered
species seeds on the territory; a boat along the river should carry
the kite.
Would you be interested in helping us to realize this
artistic action and to solve the technical problems of the
project?
Giulia and
Chiara"
It was the beginning of a new friendship with four
architects from Italy, Barcelona and Servia! I can look back to many
exiting adventures with this little group. Thank you, Giulia,
Chiara, Masa and Vuk.
Today we started with the first tests of spreading seeds
by a kite. We used the Holland 1938 kite (Fig. 82) for the first
attempts and tried several spreading bags and release systems under
the kite.
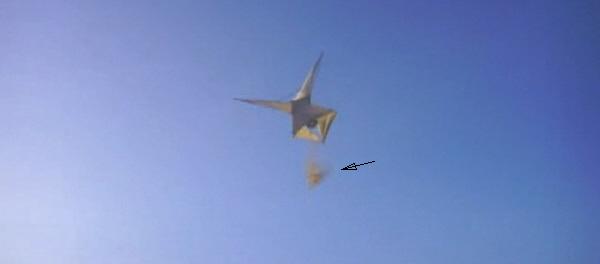
(Fig. 82)

We made also some video's to show the
results spreading seeds by a kite, one of them:
Video 3,91 MB Take your time to
download...
Or on YouTube 
(In the very beginning of this video you can see the
particular effect of the patented Holland kite steering mechanism!)
We used sawdust (Fig. 81) for experimenting in
because of the low costs and it was harmless for the nature at the
flying field.
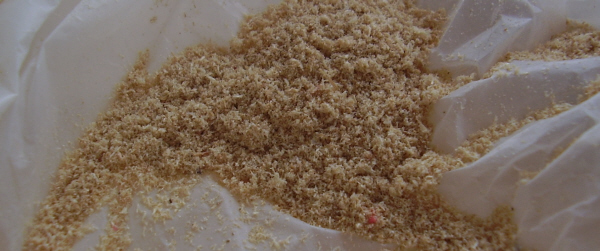
(Fig. 81)
Saturday 18, April
2009
More beautiful historical kite details appeared in
Bad Hersfeld during the International Historical Kite Workshop (Fig.
97 and 80): the
cerf-volant Oiseau owned and kindly made available for documentation by Axel
Goldbach.
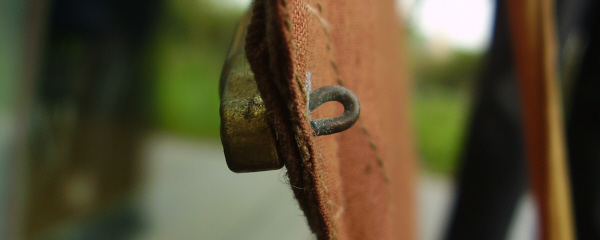
(Fig. 80)
The French kite builders did there
job very well on this patented kite!
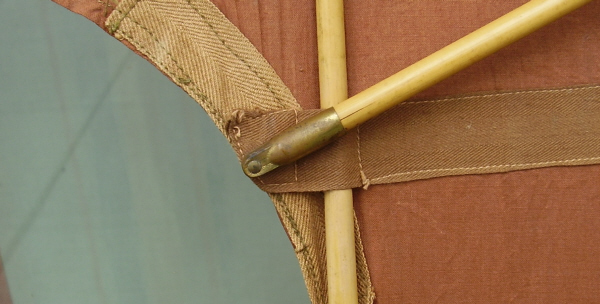
(Fig. 79)
Friday 17, April 2009
In Bad Hersfeld during the International Historical Kite
Workshop Frits Sauvé and I were in the occasion to examine a very
old and patented German kite (Fig. 78). Owned and kindly made
available for documentation by Uli Draheim.
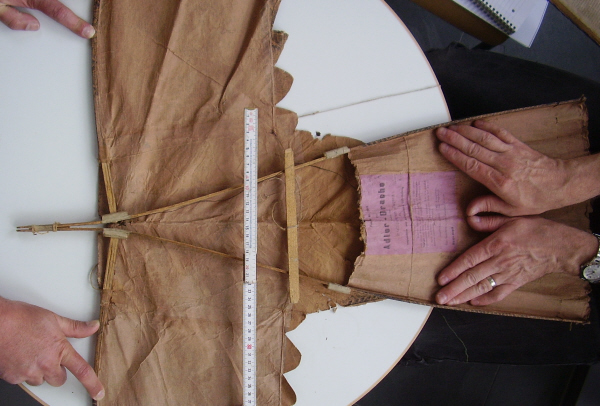
(Fig. 78)
Lovely 100 year old kite making details (Fig. 77), made
by professional German kite makers. This is the kite research I like
the most!
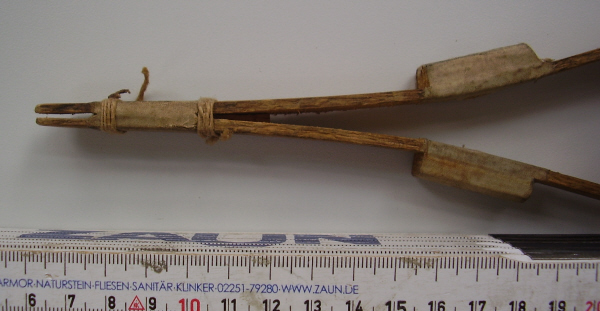
(Fig. 77)
Monday 23, February
2009
Oestele's Dreidekker is almost ready. Just
hanging at the ceiling waiting for the finishing touch and his first
test flight. But it has to wait, some other projects have to be
finished first.
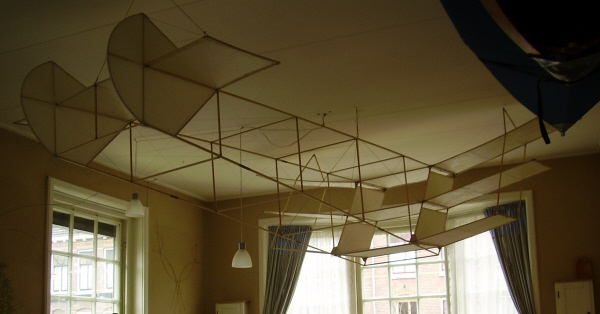
(Fig.
76)
Saturday 17, January 2009
With some good advise from some good friends, today the
solution for all my problems (as it seems to be already) arrived by
mail.
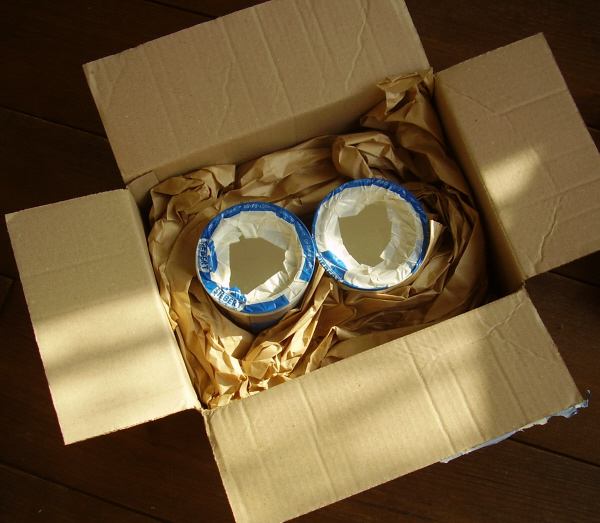
(Fig. 75)
The only trouble now is to find some time to open the
cans and give it a try. In the meanwhile Oesterle's body-frame takes
a lot of room.
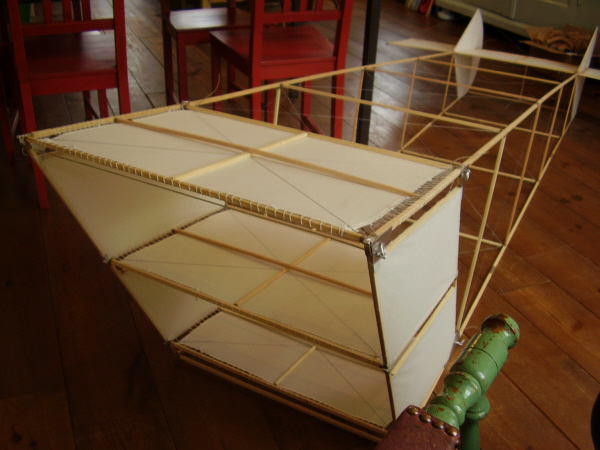
(Fig. 74)
Wednesday 31, December 2008
The last day of the year and I am sure: the real old
fashioned shellac is not the real thing. The fabric of the
little wing, below on Figure 73 has been detached and tied again and
is very tight again. The others should have to be done also. But
there is no more room to stretch the fabric in the frame (See as
reverence Figure 70.) So I have to look for a better solution then
shellac.
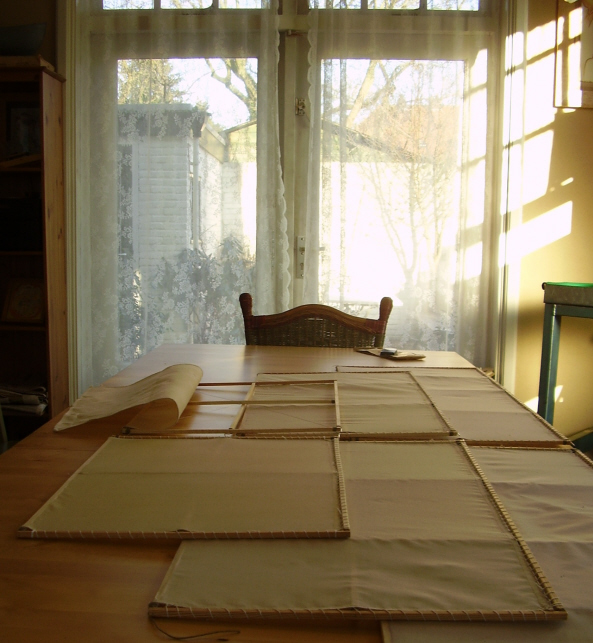
(Fig. 73)
Friday 26, December 2008
Finishing the cloth with real old fashioned shellac (Fig.
71) seams to be more and more going the wrong way! Although having
fun doing it, because it feels like real craftsman work (Fig. 72),
it slowly occurs to me that it is not working. Instead of getting
very tight cloth on the wings, it is getting very
slack.
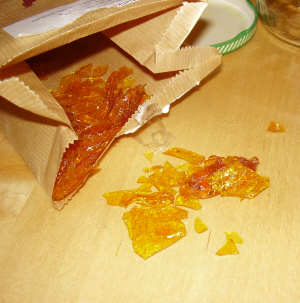 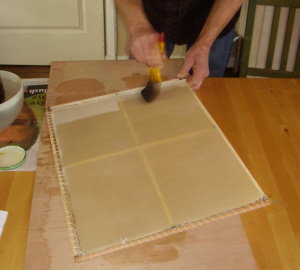
(Fig. 71) (Fig. 72)
Monday, 22 December
2008
Still going on fastening fabric. This time to the frame
parts. Although everything is written down in the manual: Wie
baue ich mir selbst? Fesselflugzeug ~ Dreidecker from Valentin
Oesterle, sometimes surprises occur. In contrast with the genius
frame construction, fastening the fabric through the papered frame
parts seems a bit amateurish. See Figure
70.
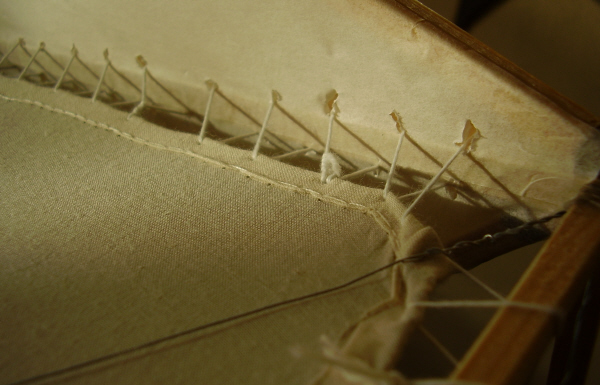
(Fig. 70)
Sunday, 7 December
2008
Finished tying the fabric in the last Oesterle Dreidecker
wing. Short lengths of thread have to be used
(Figure 69), as the manual said. So that in case of breaking one
piece thread during flight the fabric will stay in place and not
will be blown away.
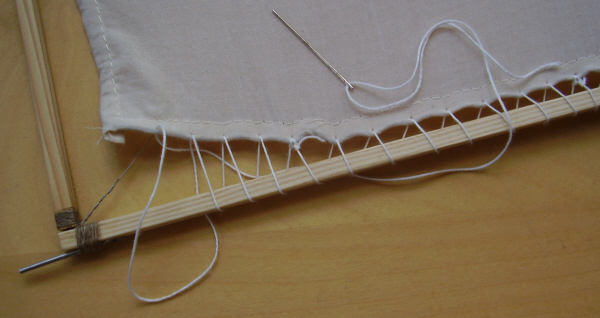
(Fig. 69)
Sunday, 30 November 2008
Last 8 months, hours and hours have been spend on
research, collecting and photographing patented and commercially
manufactured kites. All about getting a unique list of kites on the
web with well- or less known kites over the years. Kites which have
been patented, manufactured in huge amounts and sold to customers.
Who loved them or hated them for their flight qualities. Maybe you
might recognize one off your first kites.
The first part of the project is almost finished, please
take a look at the concept version of www.firstkites.nl/patentedkites.html, and check how
the new web page will be.
The second part comparing the kites with their patents.
And checking their flight qualities is in full swing. I hope to be
able to show the results within some
months.
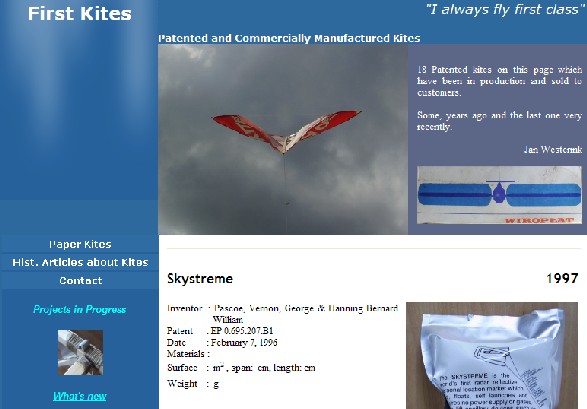
(Fig. 68)
Wednesday, 26 November 2008
Cutting the sails for the wings and sewing the seems for
Oesterle's Dreidecker is not difficult. Sewing two sides of the
wings and then just trying and stretching the fabric until the right
measurement is found.
 
(Fig. 67 and 68)
Saturday, 22 November
2008
From all the vertical parts which has to be covered, both
sides are covered with paper as described in the building manual. A
picture of the back part (Leitwerk in German)
of the body. (Figure 66)
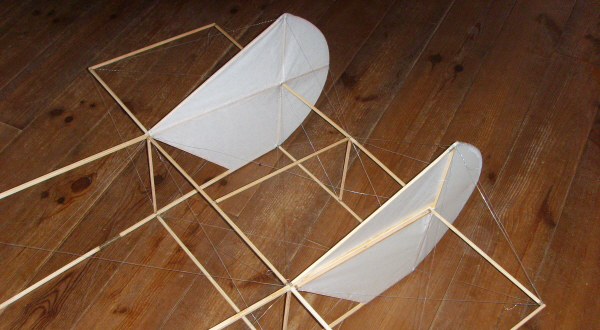
(Fig. 66)
Saturday, 15 November
2008
The triplane body, Oesterle's Dreidecker, is ready. The
question yet is which kind of covering I have to choose, fabric or
paper. Both kind of materials are described in the manual and have
there own benefits and disadvantages. Paper is lighter than fabric,
but it is weaker. It is shrinking when getting very dry. On a hot
sunny day in summer it might tear by this. It is also cheaper than
fabric. All this is also mentioned in the old building manual. Not
mentioned, but really true is that paper is easier to apply to the
wings. The horizontal parts which has to be covered are covered with
paper.
|
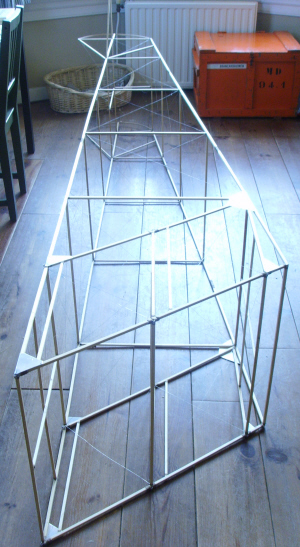
(Fig. 65)
|
The lightness is very important in this project
while I intent to raise an old 1936 camera with the kite to
take 'as it was done' black and white pictures in the
historical way.
And while doing this I like to video the whole
process in a modern digital way on the same kite.
(I hope everything will work out!) |
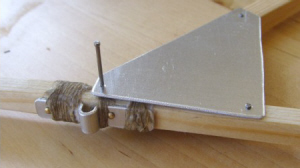
Oesterle made a very simple but ingenious construction.
Al the wooden parts are nailed(!) together. And it works out when
nailed and bored with care even the square 6x6 mm sticks. The ends
of the sticks are bound with yarn to protect against splitting.
See
figure 64 with one of the wing connections from
aluminium.
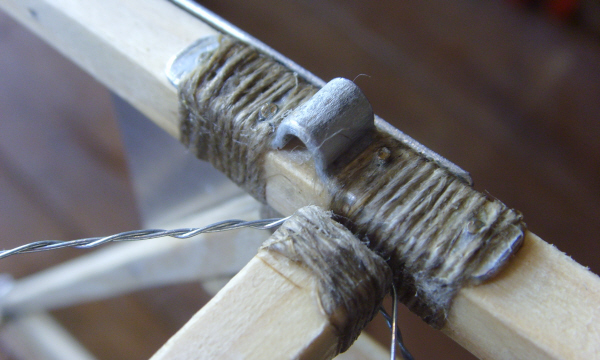
(Fig. 64)
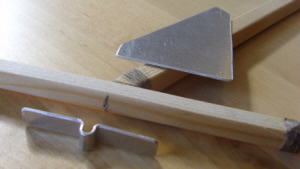 
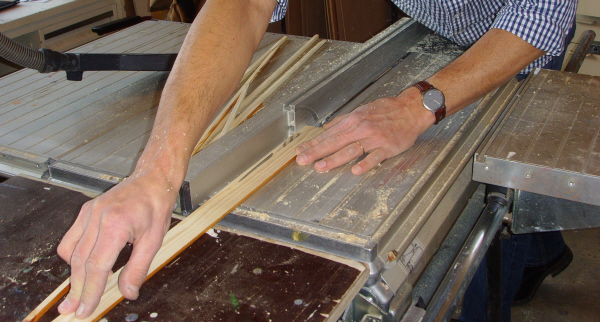
(Fig. 62 and 63)
October 2008
The work on the 'as original as possible' Oesterle
Dreidecker project started with sawing the ribs and other parts of
frame and wings. There are three sizes of sticks described in the
German building manual from 1936: "Wir baue ich mir selbst ein
Fesselflugzeug - Dreidecker" from Valentin Oesterle. (How to
build my own triplane kite):
8 mm for the longerons in the body
7 mm for wings and ribs in the front of the
body
6 mm ribs in the end of the body
Very many meters had to be sawn, luckily my father gave
some help. But still there was a lot of work to do, before the
building could be started.
(Fig. 61)
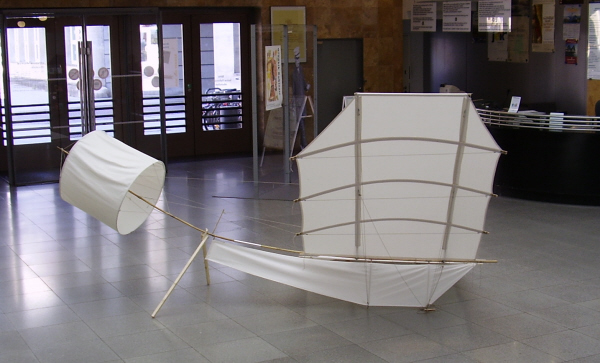
Saturday and Sunday, 26 and 27 April
2008
Two beautiful days at the Zeppelin Museum with a lot of kite friends
at the Historical Kite Workshop in Friedrichshafen at the Bodensee
in Germany. A lot of great kites were exposed in the front of the
museum. The Sellers kite was finished just in time and photographed
in the museum, see picture 60.
(Fig. 60)
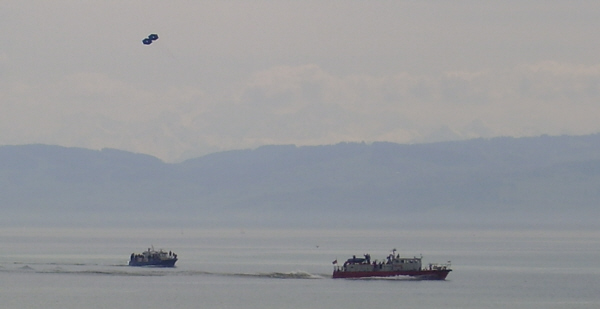
A beautiful shot (fig. 59) from the balcony at the
Zeppelin Museum of the launch of a replica of a N-Drachen as used a
100 years before by the daily kite launches at the Bodensee to do
the meteorological
observations. The replica is build by Charles Tacheron and is more than two meters
high.
(Fig. 59)
Thursday, 10 April 2008
The kites doesn't fit anymore in the room. This is not so
pretty because all the parts are ready and the adjusting of all the
parts together has to be done now.
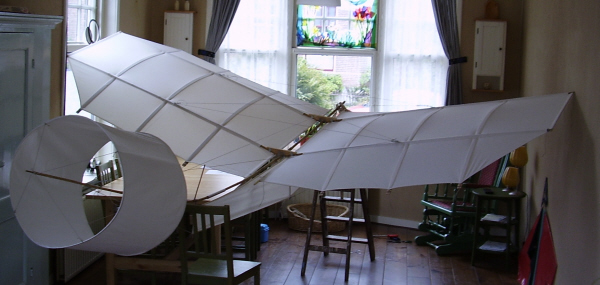
(Fig. 58)
Sellers in his Patent description about the coupling rods
on which he seems to be particular proud of:
"In this construction the coupling bar 2 is bent between
its ends to form an eye 3 and line wire 1 passes along the shank 4,
through the eye 3 and is given one or more turns about the eye and
then several turns around the shank, then one or more turns at 5
around the line wire, then several turns around the shank back to
the eye, then one or more turns at 6 in the eye." See figures 56 and
57.
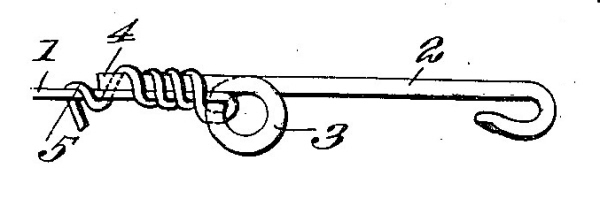
(Fig. 57)

(Fig. 56)
Wednesday, 2 April 2008
UPS-World Wide brought me yesterday the patented Fire Bird kite.
The kite was still in his original box and must be 40 to 50 years
old yet. I could not help it, I had to try this kite in spite of his
remarkable age (fig.
55).
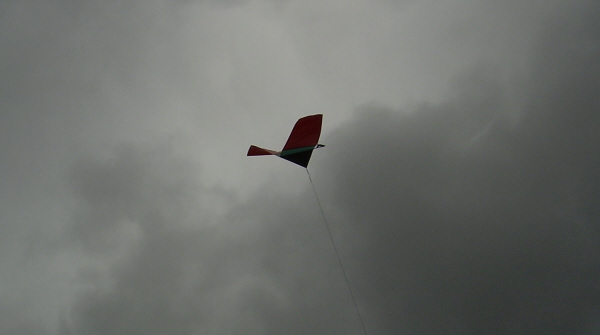
(Fig. 55)
Flying this kite I had the same experience as with some
of the patented kites I build myself. It flew, but not perfect!
Maybe the wind was to turbulent this day. The kite flew almost like
a fighter kite as be said on the kite box.
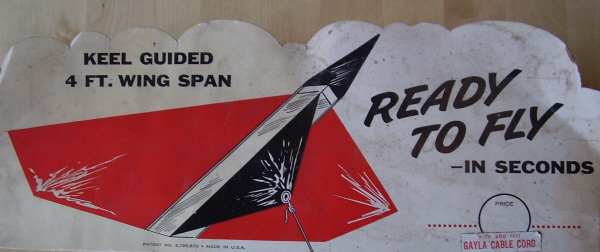
(Fig. 54)
There is a difference between the patent drawings and the
kite Gayla Manufactured. See the patent drawings below. This proves
that it is not always necessary to follow the patent drawings
(fig. 53) as exact as
possible by building patented kites. (How much proof do you need to
do something......) Check figure 8 on the patent drawing and the
photo of this part of the kite below.
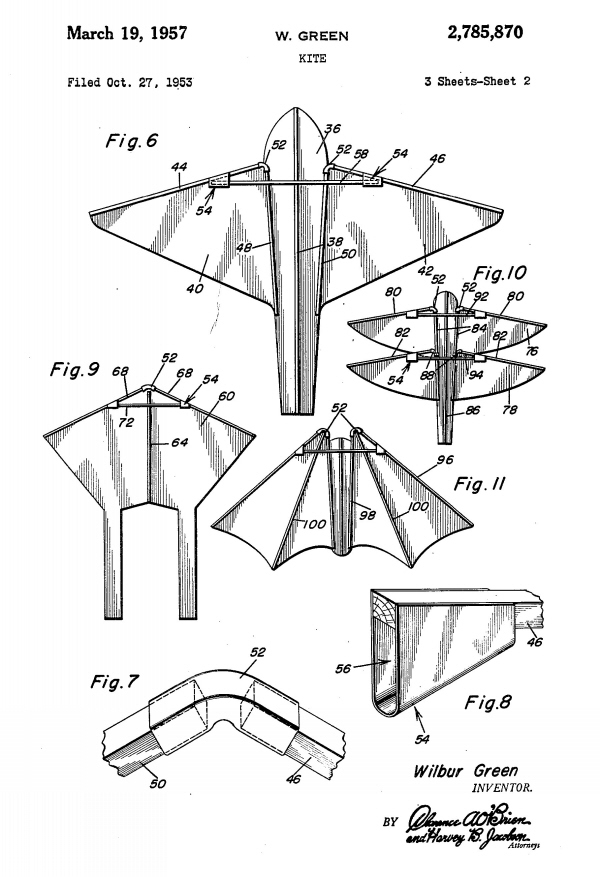
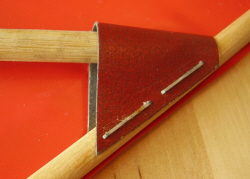
(Fig. 53)
(Fig.
52)
Monday, 24 March 2008
Several weeks ago I started the building of the US
Patent: US 886159, patented April 28, 1908. It is a kite from Mr.
Matthew B. Sellers see figure 51. As usual there were no
measurements in the patent so measurements have been chosen by
careful looking at the drawings in the patent. And by trying to get
some good conclusions about the kite measurement by comparing the
constructions details by each other.
But you can imagine how lucky I got when I came in
contact with the Aviation Museum of Kentucky, USA which made
photographs of a replica of Sellers' plane available and also his
personal notes from 1904 with drawings of the construction details
and even a photograph of the first made kite of this type. Special
thanks in this to Mr. Philip Baugh and Mr. Dennis Sparks.
Now I am trying to finish the building of this kite
before April the 28th this year 2008. Because on that
date it will be 100 years ago that this kite, called by Sellers Bird
Kite model No. 2, was patented.
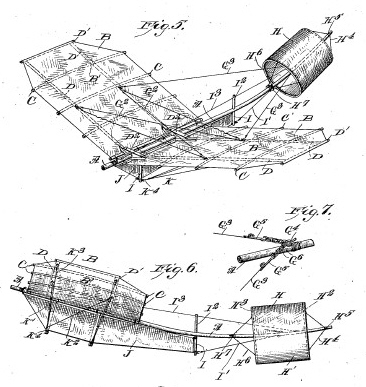 
(Fig. 51)
(Fig.
50)
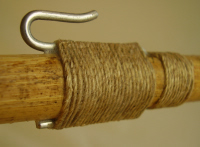
On
figure 50 you can see the wing adjustment hook as drawn at
figure 7 on the patent. This hook is placed in the cylindrical tail.
Today I finished the fuselage of the kite. The cotton covering of
the wings is ready and also the cylindrical tail (fig.
49).
(Fig. 49)
Thursday, 26 February 2008
(Pic. 48)
Before I started the building of the Perrin kite from
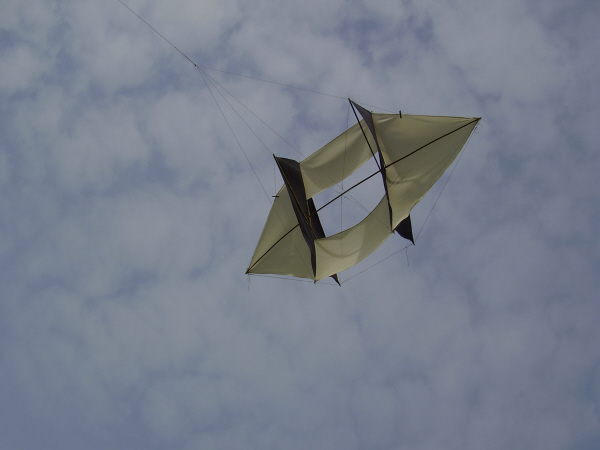
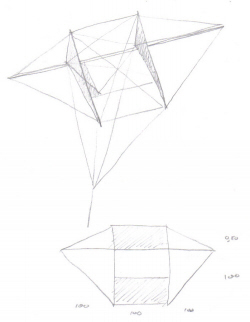
1912, I had some thoughts to chance the model in a better shape. See
picture 2. But now when I finished the test flights, I am glad I
didn't! Only the use of two clothes pegs was enough to get this kite
in the air and let it stay there as long as I desired. In his
original, beautiful, historical shape. (Pic. 48 and Pic. 46).
See the leading edges of the triangle wings for the clothes
pegs.
 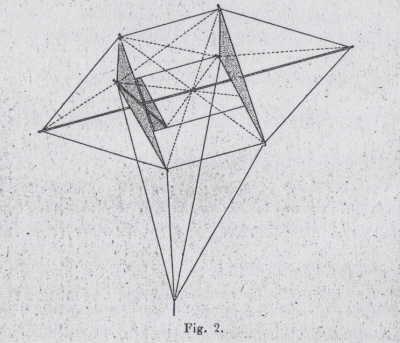
(Pic. 47) (Pic. 46
From La Revue du Cerf-Volant, December 1912, P.
276)
Monday, 25 February
We tested the by Jan Kits improved version of the SOS
Brookite, and it indeed flew like a Jan Kits kite. Check the plan on
the SOS Kite page. (Not ready yet!)
(Pic. 45)
Only the red and yellow parts are 'original' at picture
45 but the important improvements are almost invisible.
Monday, 4 February 2008
The Dunne kite of Frantzen is ready, most of the bamboo
is changed for stiffer ones and now at the third trial it flies very
well. (Pic. 44)
(Pic. 44)
The Big One, started building somewhere in 2007,
weights almost 5 kilo's and has a span of 4,5 meter!
(Pic. 43)
A little dramatically video of the first test flight. I
was alone, so I couldn't do everything that had to be done. I even
could not get the outer two bridles. So the kite was flying with
only one third of the bridle pinned to the ground. Which proofs how
remarkable this kite is. It can fly a bit with almost no bridle and
with very weak and to thin bamboo sticks. These sticks were replaced
later.
Video 7,37 MB Take your time to
download..
Sunday, 12 January 2008
Racke (Around 1900) is still waiting for a nice sunshiny
day. In the last months the whole bamboo frame is split into half to
get the frame as light as described in the old books where this kite
from Belgium is mentioned. (Pic. 42)
(Pic. 42)
Picture 41 is taken at a test flight some months
ago.
(Pic. 41)
Sunday
09-12-2007
Not the most beautiful
kite, but designed as it is as a good flyer, just fun to fly: The
Potter Diamond Kite. Almost build as described in the Monthly
Weather Review. But this time build as a light wind kite with a
paper covering on light poplar wood. (Pic. 39 &
40)
(Pic.
40)
(Pic.
39)
Detail of the notched
strut (Pic. 40)

(Pic.
40)
Guests from 30 km/h - 18 mph are to much for the
poplar light wind frame. See the deformation of the frame at picture
39.
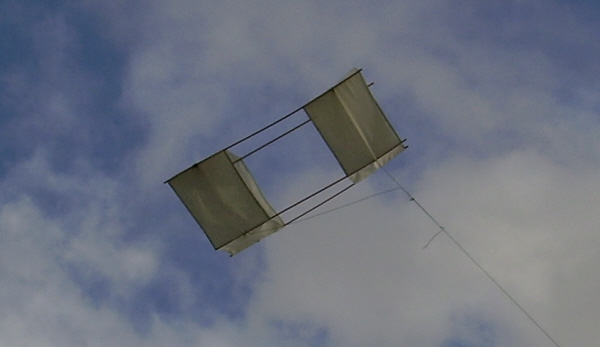
(Pic.
39)
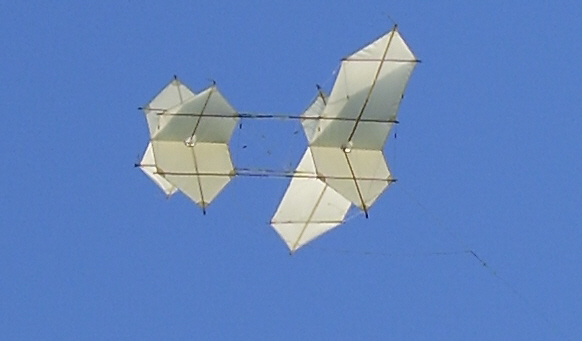
Sunday
25-11-2007
First test flight of the
whole size Ickx kite ended in barbed wire. But the second and others
were a great success. Only some adjustments to the bridle have to be
done yet. (Pic. 38)
(Pic.
38)
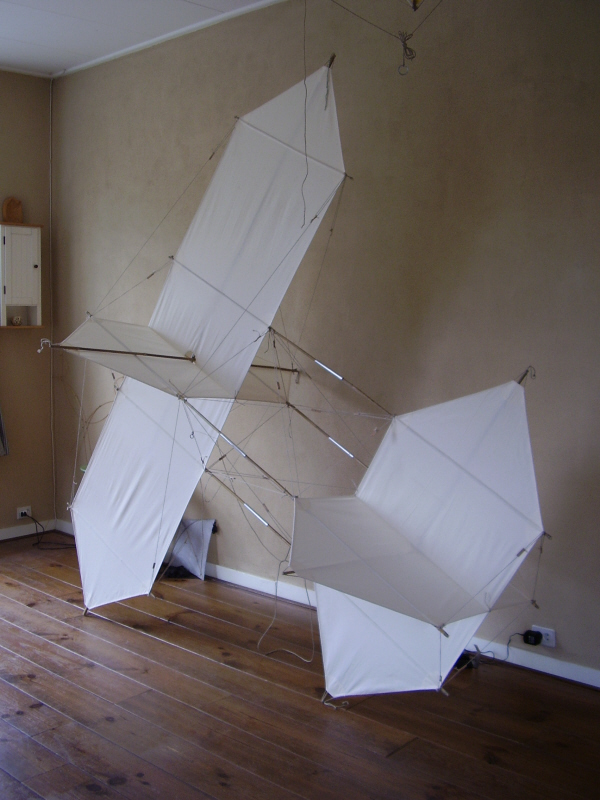
(Pic.
37)
Big kites belong in the
air, but the problem is, you have to build them at home. (Pic.
37)
Tuesday
23-10-2007
Today I broke my
personal altitude record with a simple somewhat heavy winged
triangular box kite (Pic. 36) constructed as if it was a toy kite.
Dimensions: 160 cm. wide, 117 cm. high, 390 g.
weight.
We had a 4 Bft. today
and it was big fun with simple kites. I think there are two kinds of
kites: Kites you like to make, test and experiment with and another
kind of kites for flying them with great fun and no
problems!
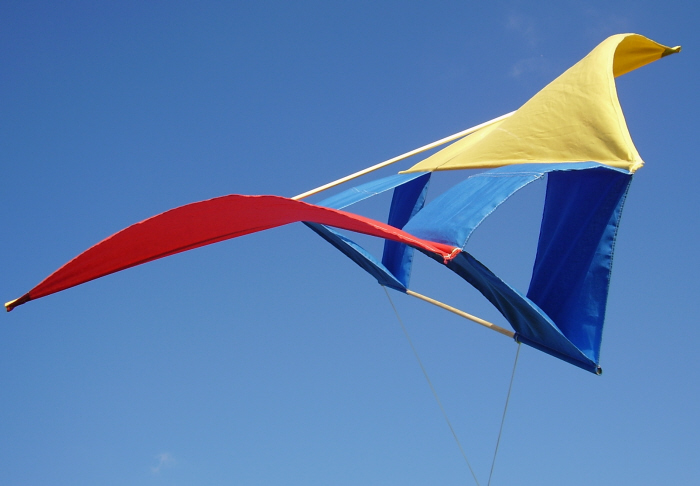
(Pic.
36)
Sunday
23-09-2007
The Hirondelle doesn't
still fly very well. Every adjustment has been tried out, also a
second Hirondelle has been made (Pic. 33), with the same results.
The latest idea now is a modification of the frame, see pictures 34
(before modification) and 35 (after modification). With this
modification the kite gets his wings somewhat higher and in a better
shape. It also looks more like the picture shown in the article in
Le Revue du Cerf-Volant, July 1912 by V. Aston, where this kite
comes from.
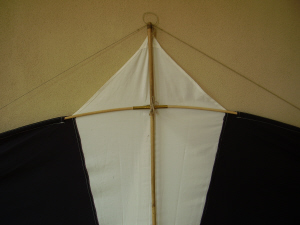 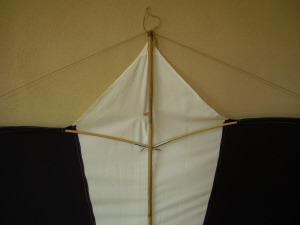
(Pic. 34
and 35)
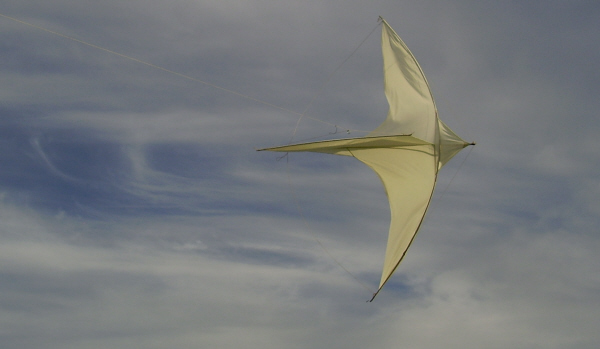
The white swallow kite
(Pic. 33) has his wings and major part of the body cut out of one
piece of cloth, as described in the article from 1912. A more open
cloth has been used to give the kite more stability, but it wasn't
enough as you can see at picture 33.
(Pic.
33)
Saturday
25-08-2007
Its a good thing: taking
as much pictures as you can during test flying. Afterwards at home
you see things you didn't see at your flying
field...
Maiden test flight of
the Hirondelle, 1912. A bird kite (swallow) which has been flown
2000 m. high once. Our record this particular day: almost 20
meters!
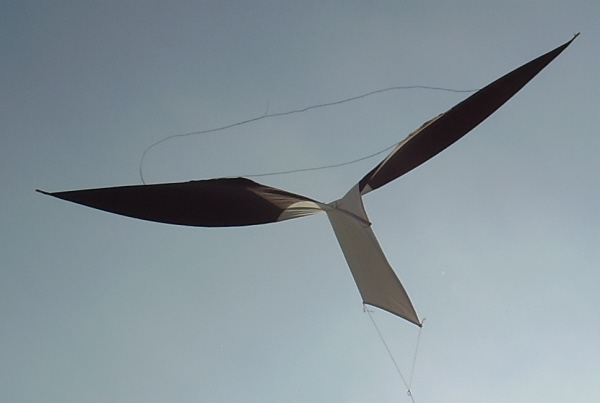
(Pic.
32)
The Hirondelle with al
the adjustment lines untied (Pic. 32) has nice shaped wings, but
doesn't fly very well...
Saturday
21-07-2007
Third test flight of the
kite of the Ickx brothers. Not enough wind... no real
flight.
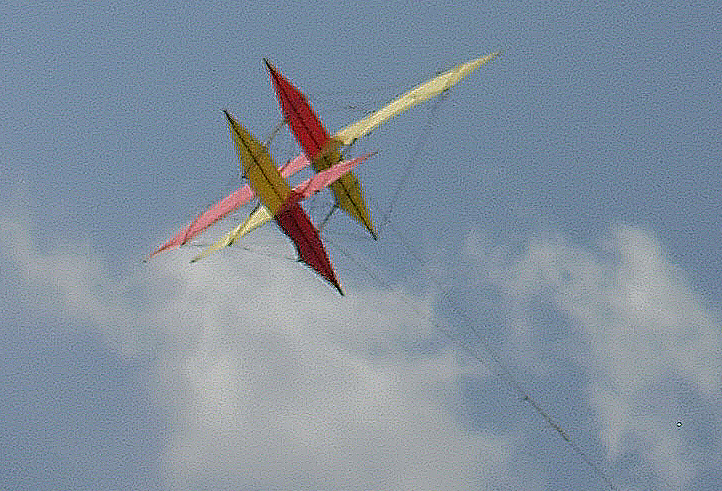
(Pic.
31)
The only picture taken
some seconds before the front wing stick broke. (A little sharpened
picture 31.)
First thoughts on the
test results:
-
Quick raiser (We pulled the line by running as an
authentic kite flying child!)
-
Stable kite
-
Small wind range
-
But
strong puller, when the kites catches some wind (As described by the
Ickx brothers.)
-
This
heavy half size model needs almost 5 Beaufort (Densité of this kite:
a little more then 0,6)
-
The
whole size one, which is under construction, must be able to have a
better practice.
-
This
kite has absolutely no aero dynamical wings, the wings are as flat
as possible.
Construction detail from
one of the small wing spreader sticks. (Pic. 27 - 30) The stick on
his place at picture 26.
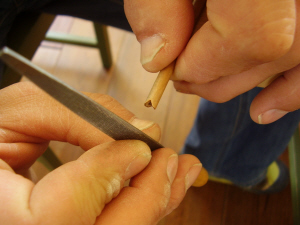 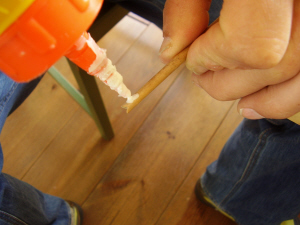 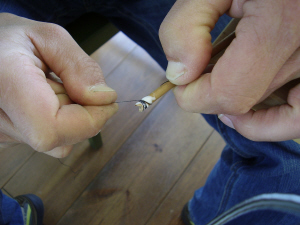 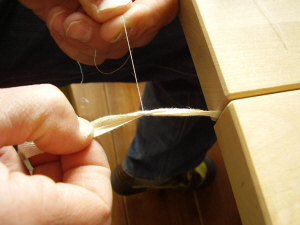
(Pic. 27
- 30)
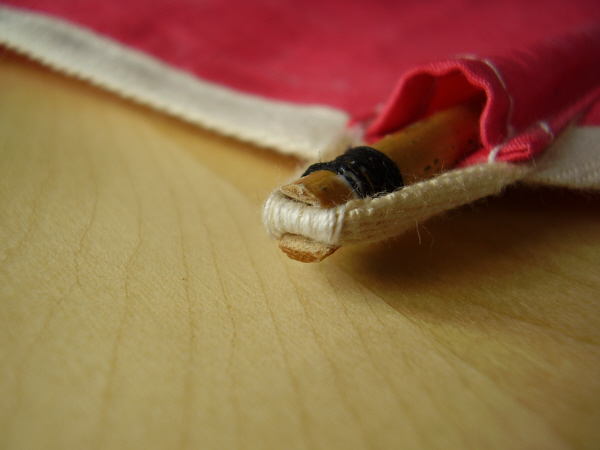
(Pic.
26)
Thursday
12-07-2007
What more do you
need...?
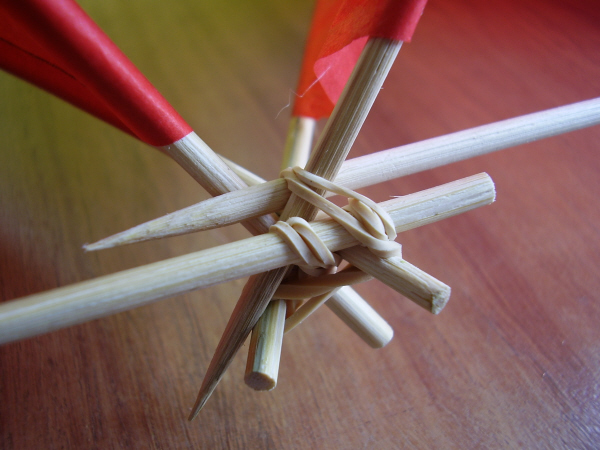
(Pic.
25)
20 Minutes work and
there it is: a real Bell tetrahedral kite, made of barbeque pins
(bamboo), rubber bands and some pieces of rice
paper.
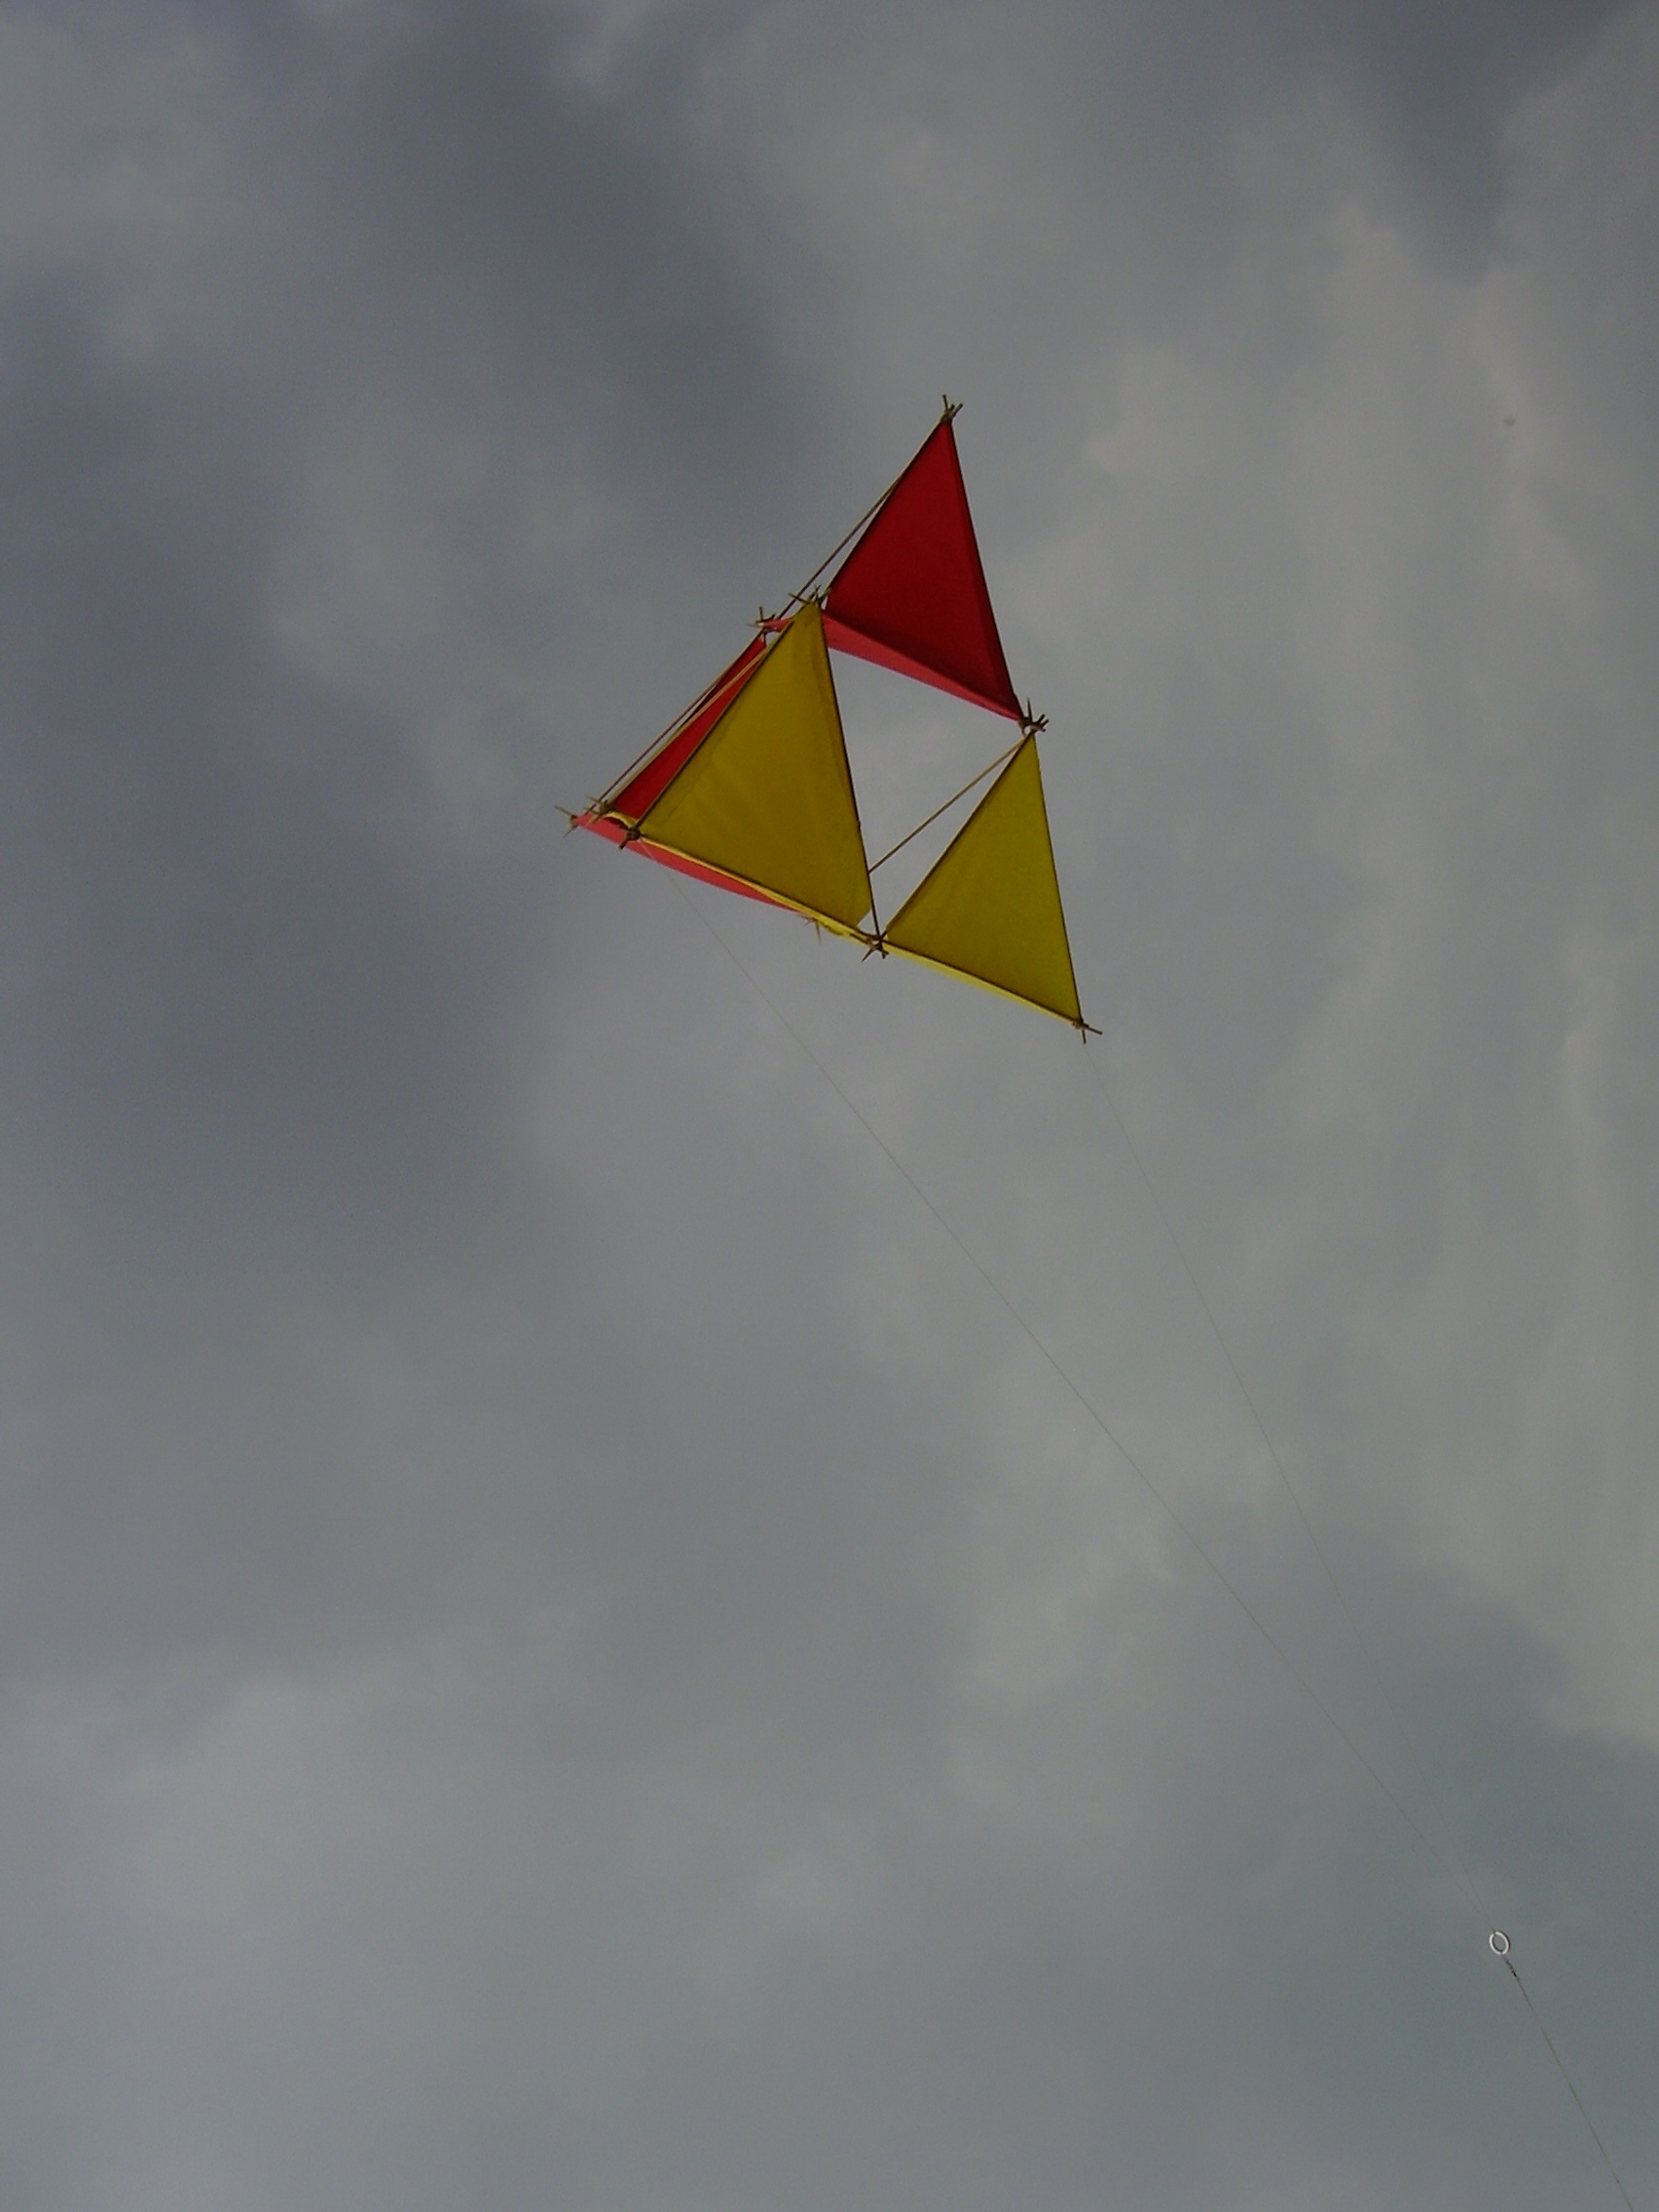
(Pic.
24)
But there seems to be
some relation between time spent building your kite and stability in
the end...
Sunday
29-04-2007
The improved Irvin kite
has been tested and the results are very good! It can even fly
(better!) without a tail. The improved shape of the front sail of
the kite, has more
similarity to the drawings in the patent.
Irvin before
modification:
(Pic.
22)
Irvin after
modification:
(Pic.
21)
Friday
27-04-2007
Although we had to coop
with the usual problems (Pic. 18) when flying experimental paper
kites, in the end we succeeded to take good pictures of the paper
version of the patented kite from Mr. Holland. (Pic. 20) See how the
principals of this kites works: http://www.firstkites.nl/m7.html
(Pic.
20)
The usual problems with
experimental paper kites. (Pic. 18) A difficult moment: the
principle of the patent doesn't work for some seconds. (Pic.
20)
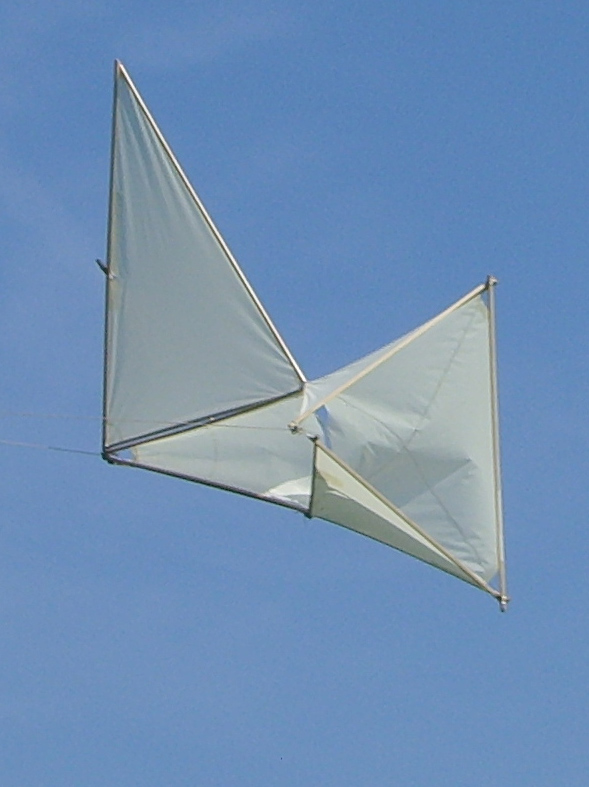
(Pic. 18
& 19)
Sunday
22-04-2007
Kite flying on top of
Germany. (Pic. 17)
Very rarely: Kite flying
on the glider airfield 'Wasserkuppe' during the International
Historical Kite Workshop 2007. Three new built historical kites,
from left to the right: Roloplan, Dahl and a Pearson
Roller.
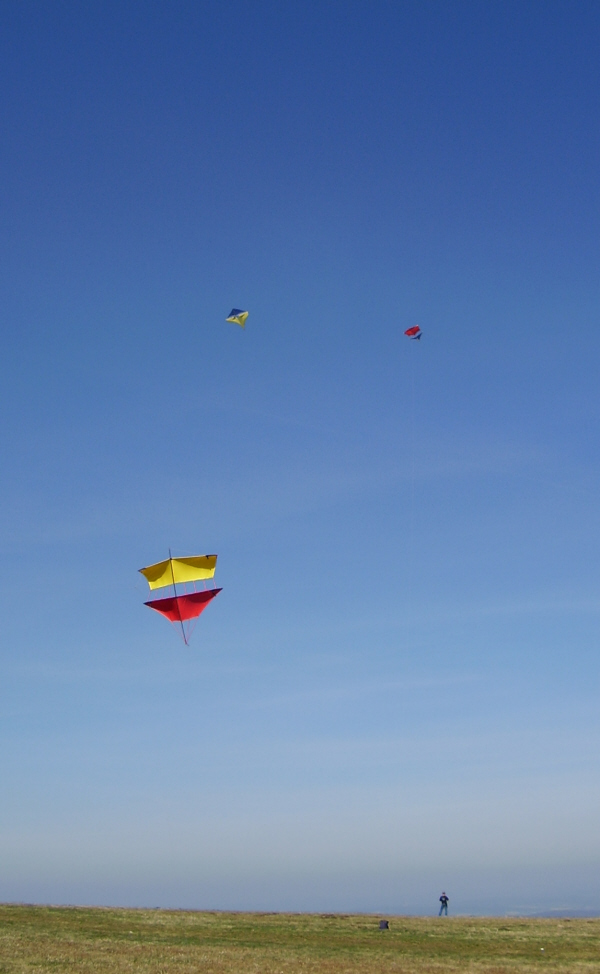
(Pic.
17)
Some children with basic
kite flying between all the historical kites, the real thing...
(Pic. 13 - 16)
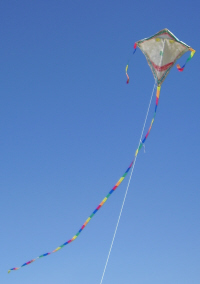 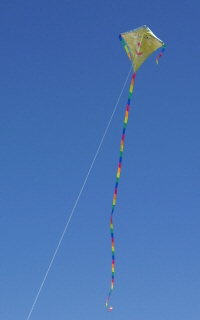
(Pic. 13
- 16)
The workshop kite from
Gotlob Espenlaub in its origin environment. (Pic.
12)
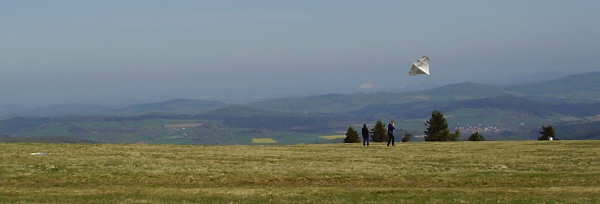
(Pic.
12)
March -
April 2007
Nothing special, still
working on a bigger Frantzen (See Saturday 24-02-2007). This one
will be in black cotton. Nothing special, only bigger kites need
more ours sewing...
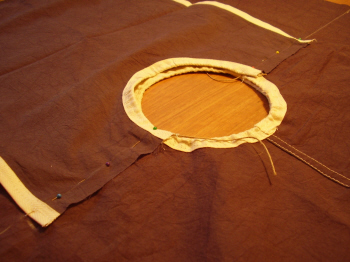 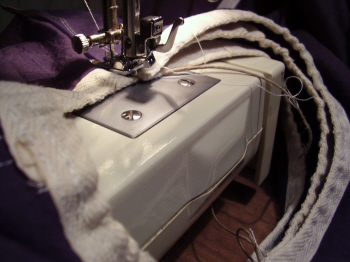
(Pic.
10)
(Pic. 11)
In the meanwhile on
sunny Saturdays, some test flying and adjusting on other kites is be
done. For instance to decrease the flapping effect of the sail of
the Dahl kite (pic. 9) with keeping the principle working of the
kite in mind...
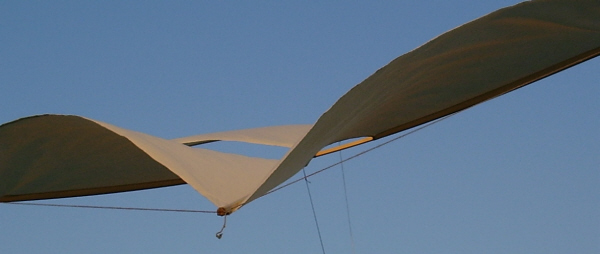
(Pic.
9)
Saturday
24-02-2007
"Etude pour une
cerf-volant", wrote Lucien Pierre Frantzen above his sketches in 1914. Today
I had a perfect second series of test flights and it felt like a
symphony! Everything was perfect, the weather, the wind and most of
all the kite: half size model #76, span: 230 cm. (Pic.
8)
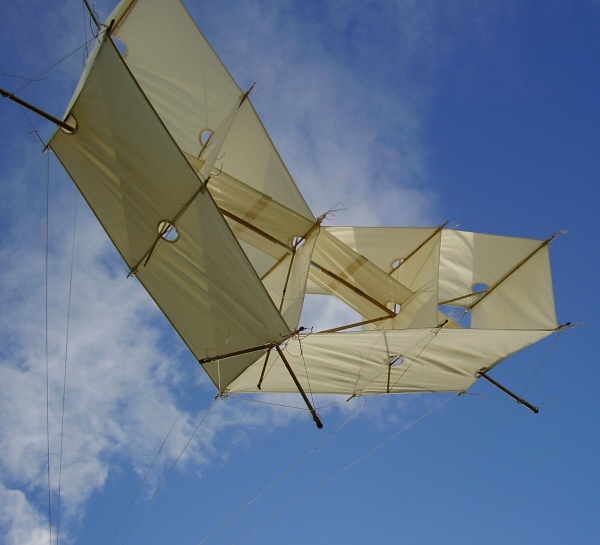
(Pic.
8)
Saturday
17-02-2007
First flight of Génesis.
(Pic. 7) Four pieces straw, an orange wrapping paper and very little
glue, that was all. Lounged from a playing field between houses one
stick broke when it got to high and caught the 'full' 2 Beaufort.
But it still was capable of flying!
Surface: 0,0925 cm²,
span: 37 cm, length: 115 cm, weight: 4 g.
('Génesis' is the brand
of the oranges which were covered with the
paper.)
 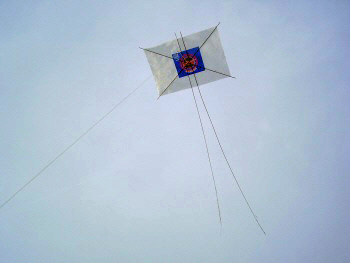
(Pic.
6)
(Pic. 7)
Friday
6-02-2007
Third test flight of the
Kurkjian. Everything is working! (Pic. 5)
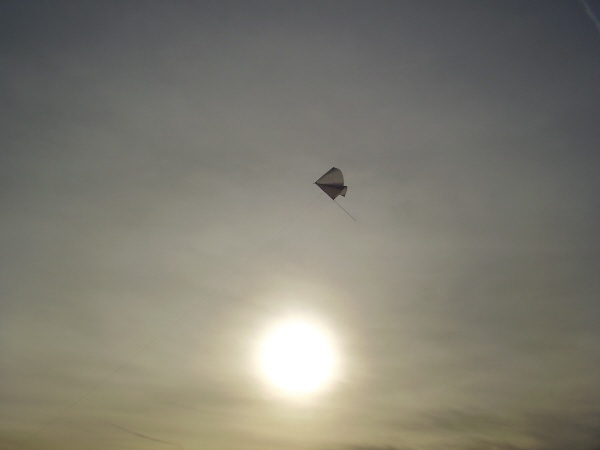
(Pic.
5)
Sunday
21-01-2006
Starting again (after
the first test flight at 01-10-2006) with the Frantzen/Dunne
project: Adjusting the half size model #76. (Pic.
2-4)
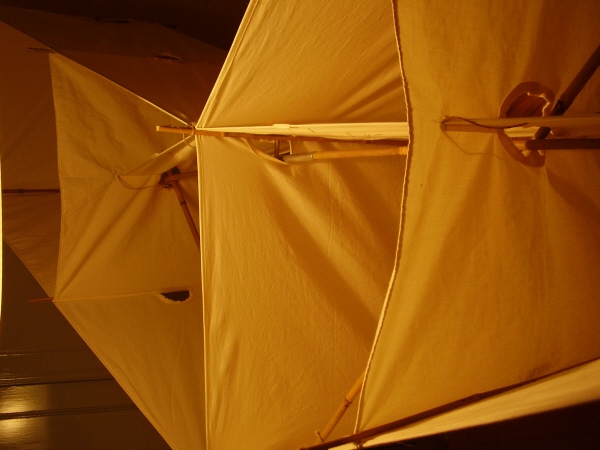
(Pic.
4)

(Pic.
3)
(Pic.
2)
Saturday
20-01-2007
Second test flight of
the Kurkjian. Some problems with the bridle point. (Pic.
1)

(Pic.
1)
previous
page /  |